Friday, April 29, 2022

White Scars and Thousand Sons vs Necrons and Chaos Knights

Today's game represented the culmination of the Octarius System campaign's first phase, stage 4, a mission called Break the Stalemate, from War Zone Octarius book II.  This was a two on two game, where my White Scars were paired off with the campaign master's (Sam) Thousand Sons against the same Necrons I played last time paired with some Chaos Knights.
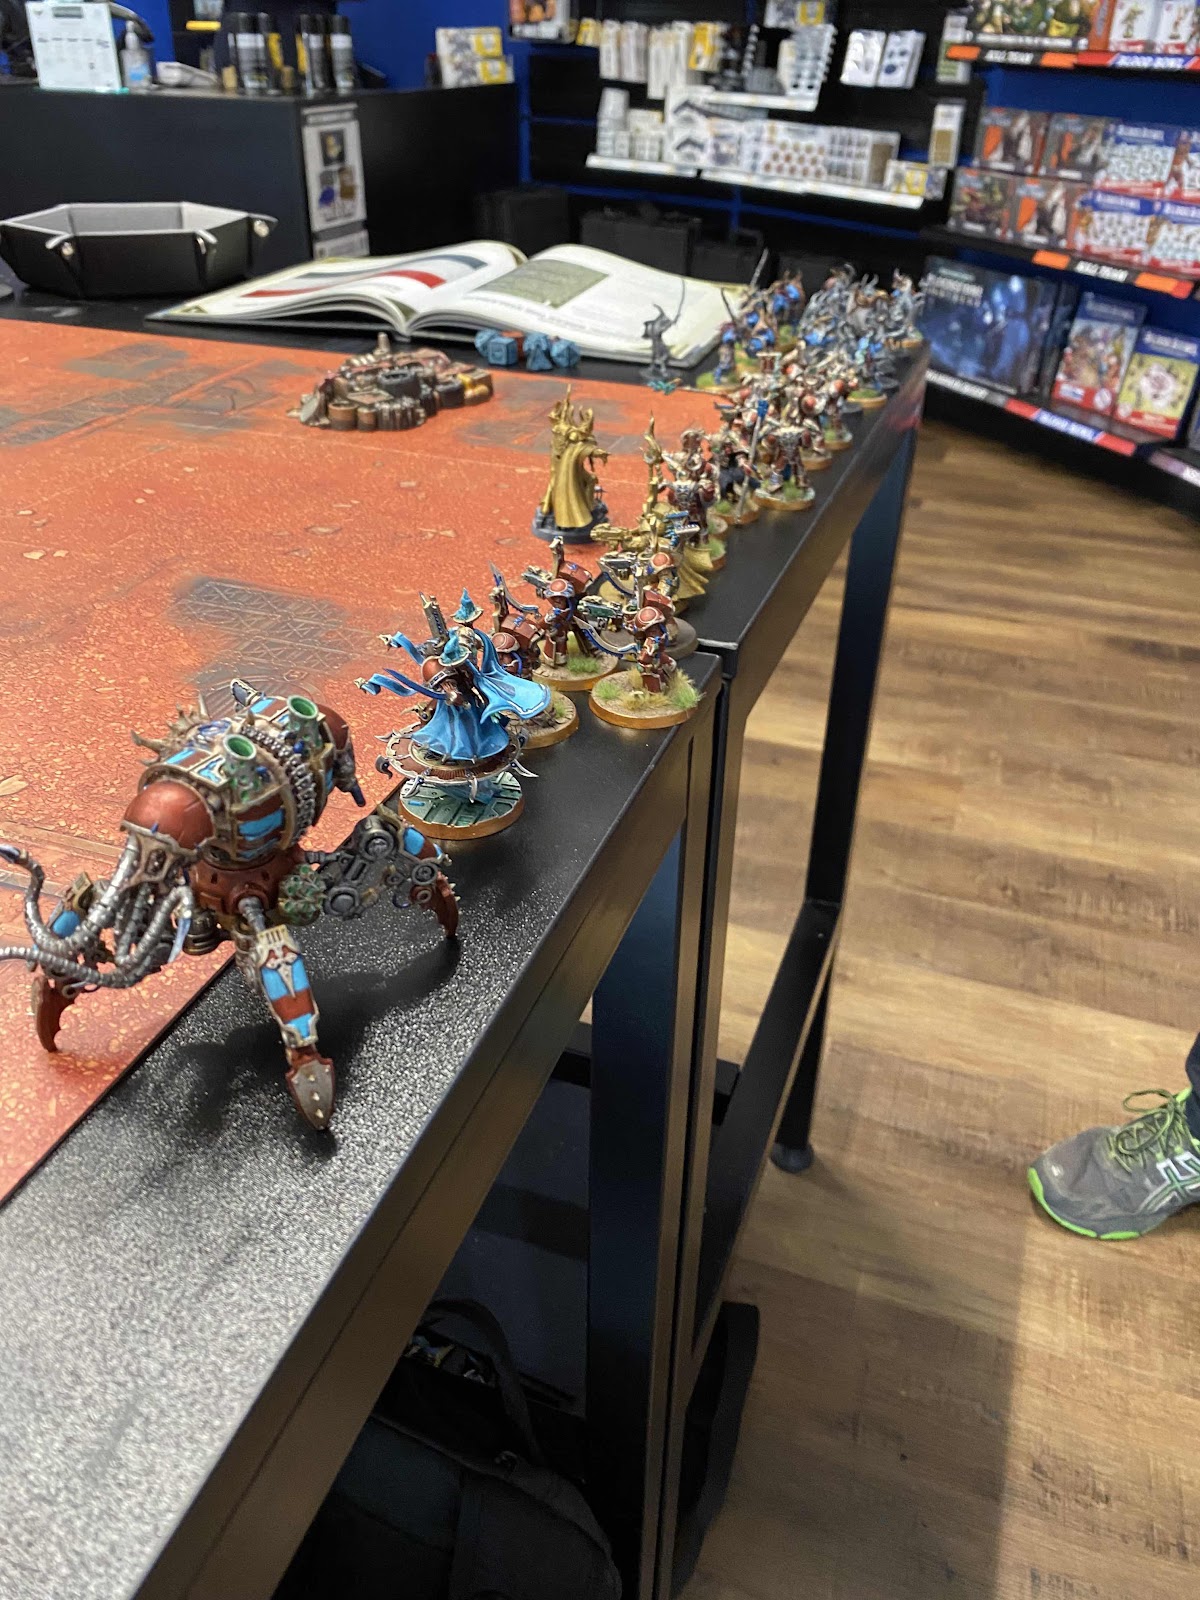
The Thousand Sons:


The Chaos Knights:


The mission is an interesting one where it's Dawn of War deployment (on the long edges), and five objective markers are put in a line down the middle of no man's land, representing the front lines of a battle. In your command phase, you can move the objectives you control 6" toward your opponent's deployment zone, as though pushing the battle line back. You get VP each round based on how many objectives are pushed in this way.

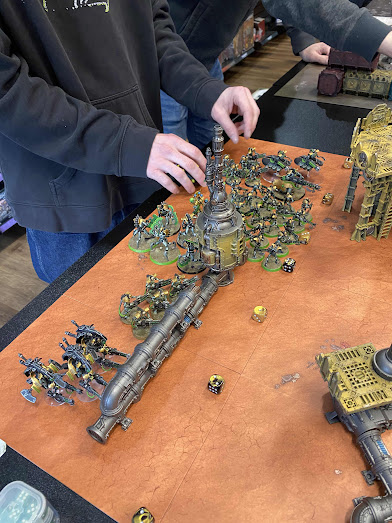
We were defending, so we went first in deployment. We were also both using the entire side of the board, so our forces were intermingled. The field was pretty limited in terms of terrain, so to try to avoid deploying in the kill zone of the big Knight Tyrant, I put my Centurions over to the other side of the board, obscured from that one model. My Terminators were in striking distance of an objective, and the War Dogs, as well. I had a combat squad of Tactical Marines in some ruins where their heavy bolter could pick targets of opportunity, and my other combat squads and bike squad were poised to head toward other objectives and hopefully harry some necron warriors. My Stormseer Librarian was with the Centurions, and my Captain was with the Terminators to help them hit with those power fists.

Left side deployment:


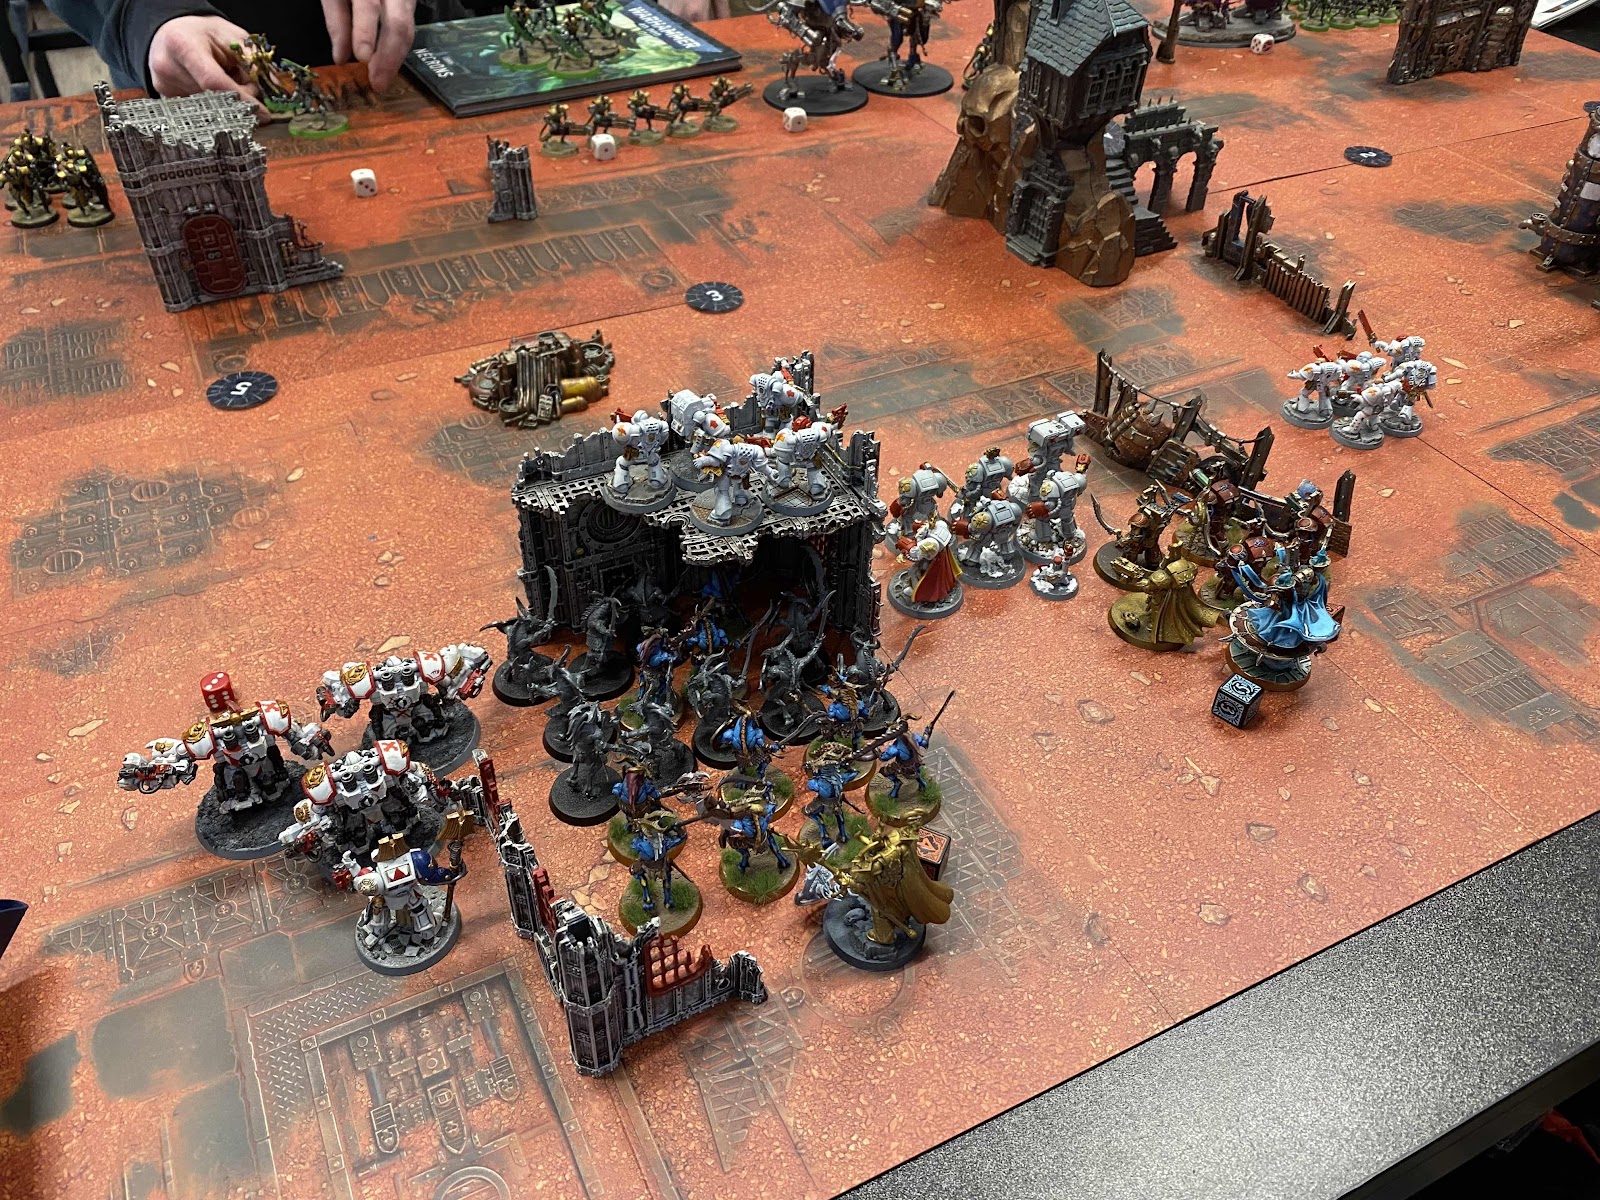
Right side deployment:


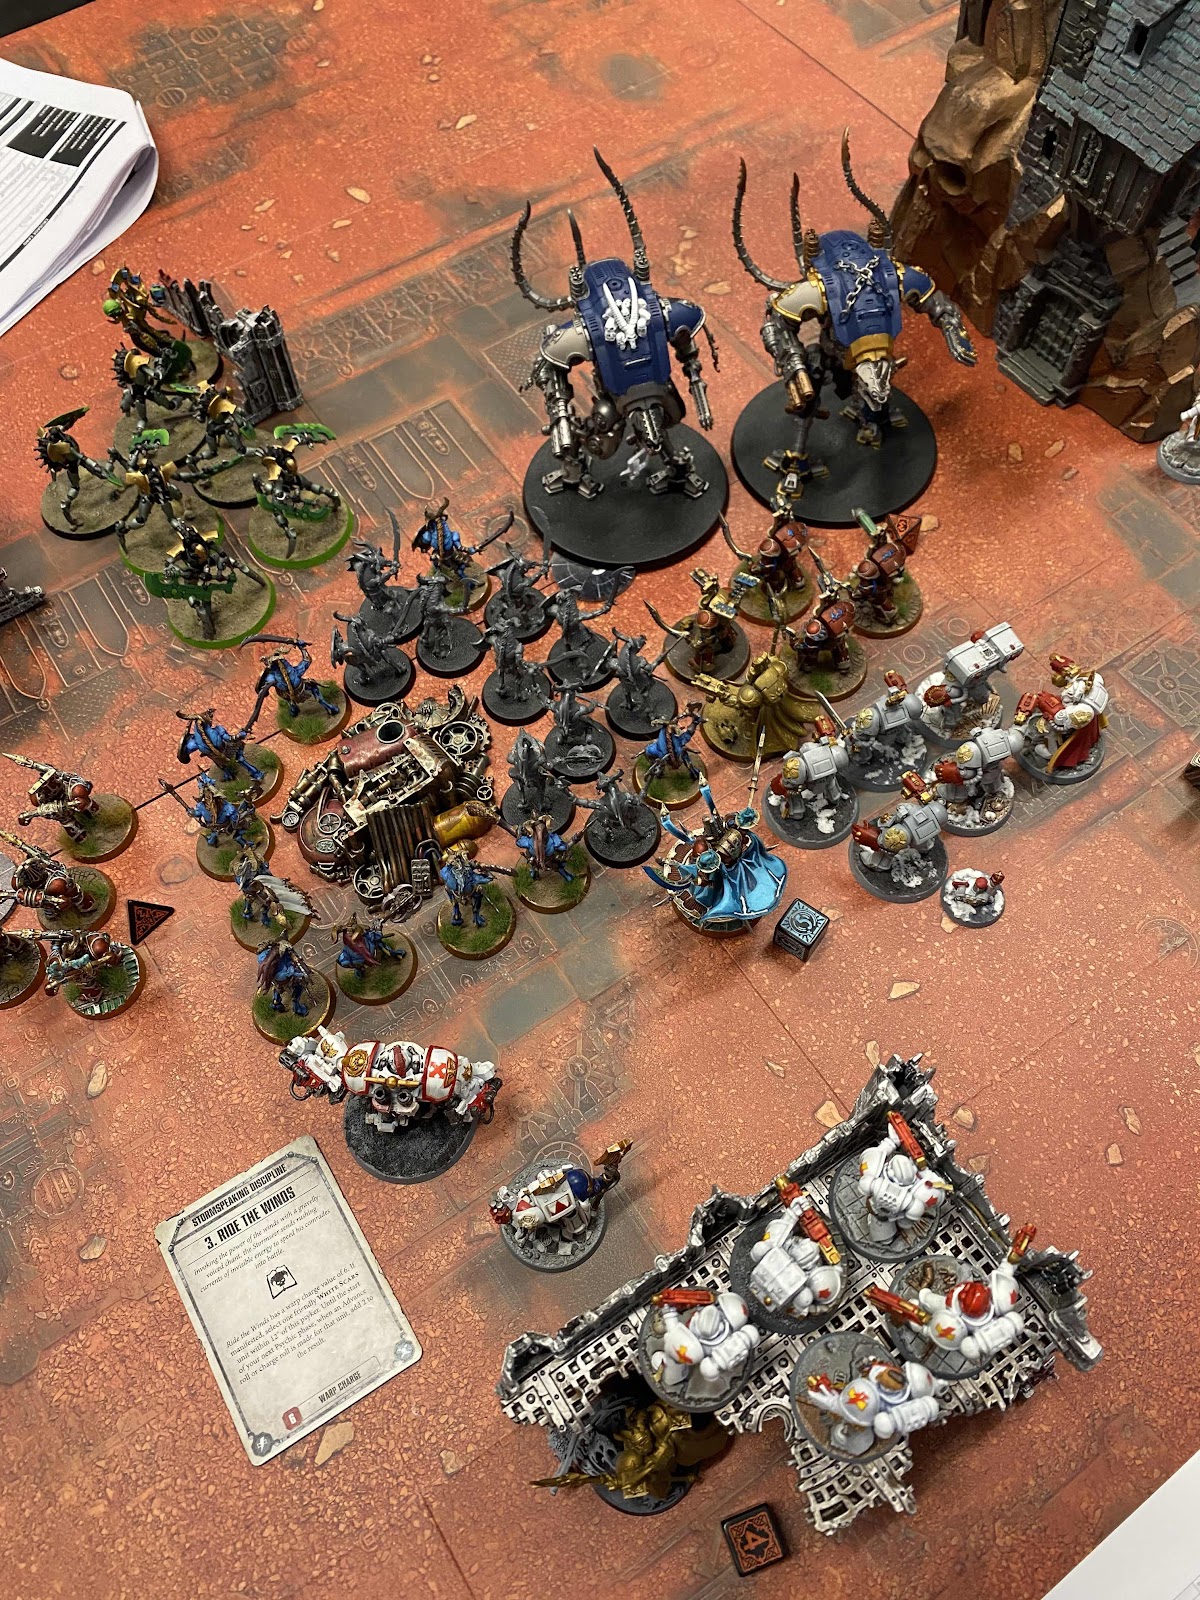
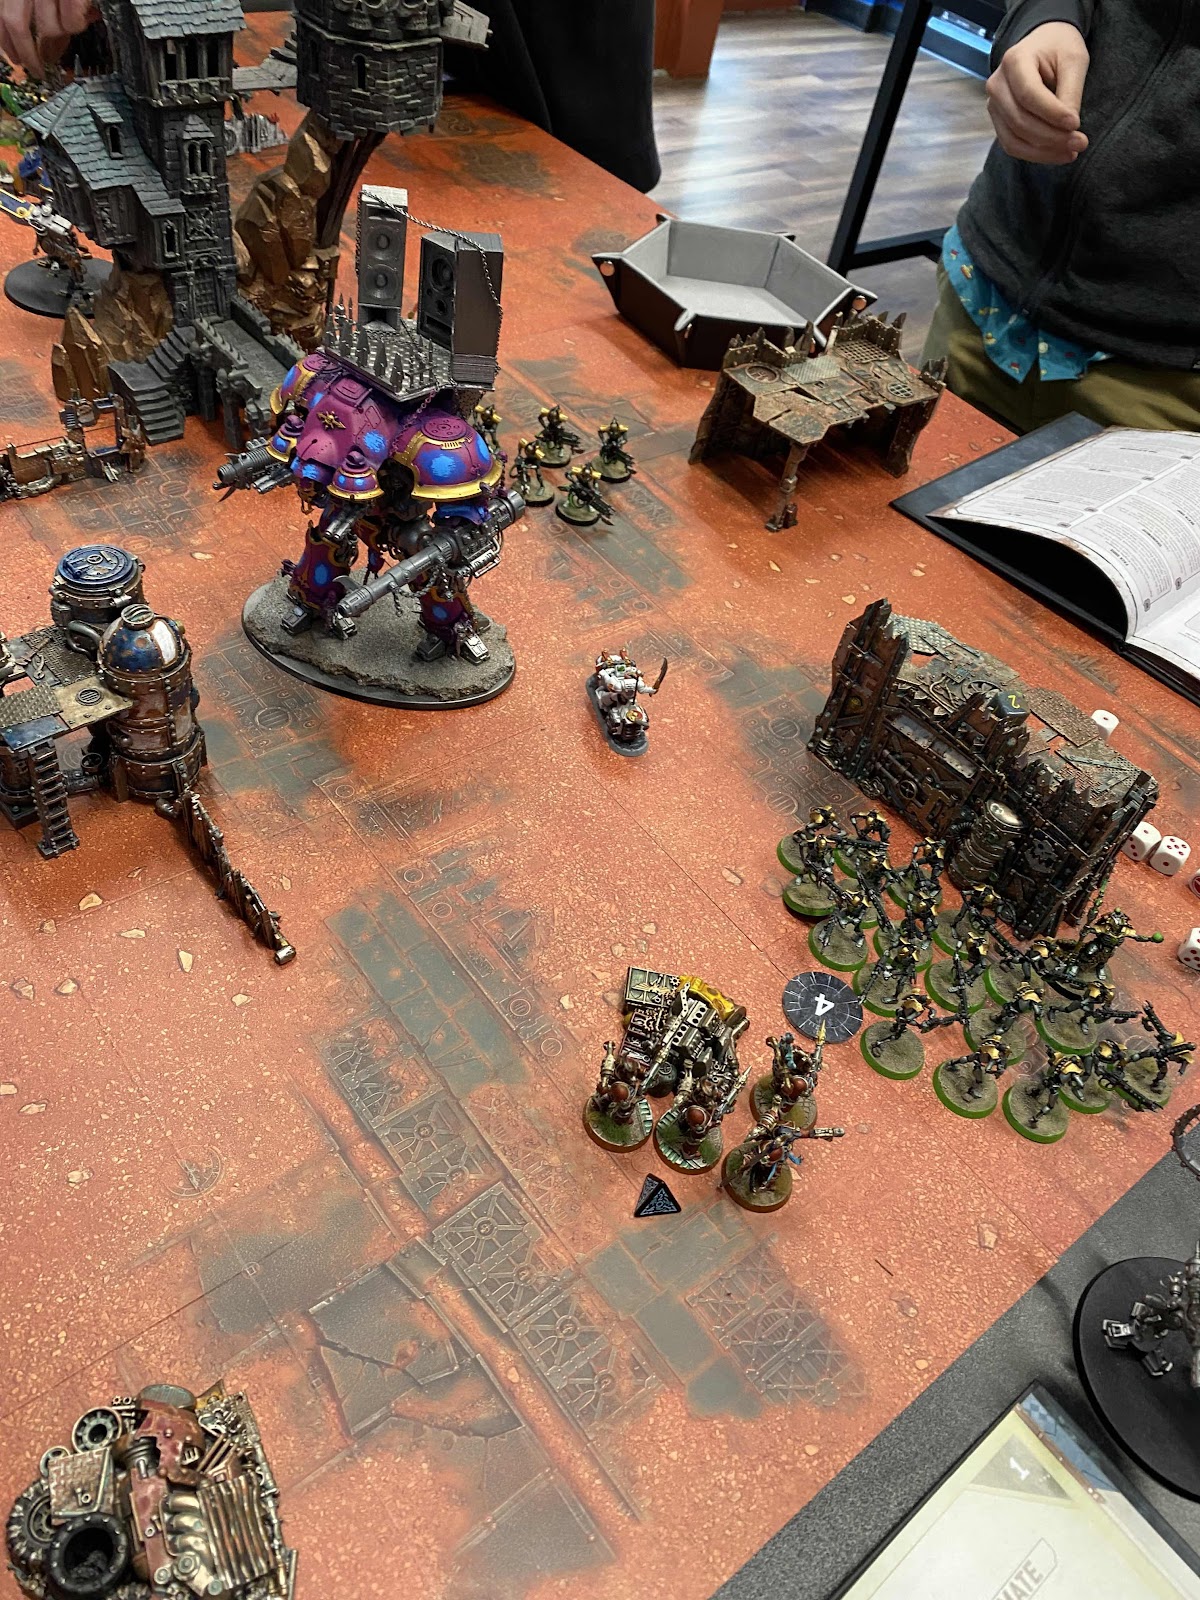
Sam deployed a bunch of Tzaangors, a Defiler, some Rubricae, and some Scarab Occult Terminators, along with an Infernal Master and an Exalted Sorcerer on Disc of Tzeench.


The enemy lines:


We won the roll-off for first turn, and decided to take it. In the first turn, I moved everything up but the one combat squad in cover. Most units advanced, so there wasn't much shooting, and no charging done this turn. I cast Ride the Winds on my Centurions to help them with mobility for the next round, and I did Smite three wounds off a base of scarabs on the necron side, and also kill another with a single Centurion's meltaguns (the other two were out of range). There was a lot more psychic from the Thousand Sons, of course, and some shooting, as well. I couldn't tell you exactly what of either, because we were taking our combined turn at the same time, and sort of loosely calling out shots and agreeing on what to focus down where it really mattered.


The Thousand Sons had the brunt of their force over on the left side, out in front of my Terminators and Centurions. Probably due to them being faster, even though I had advanced my stuff up 7 or 8 inches each.


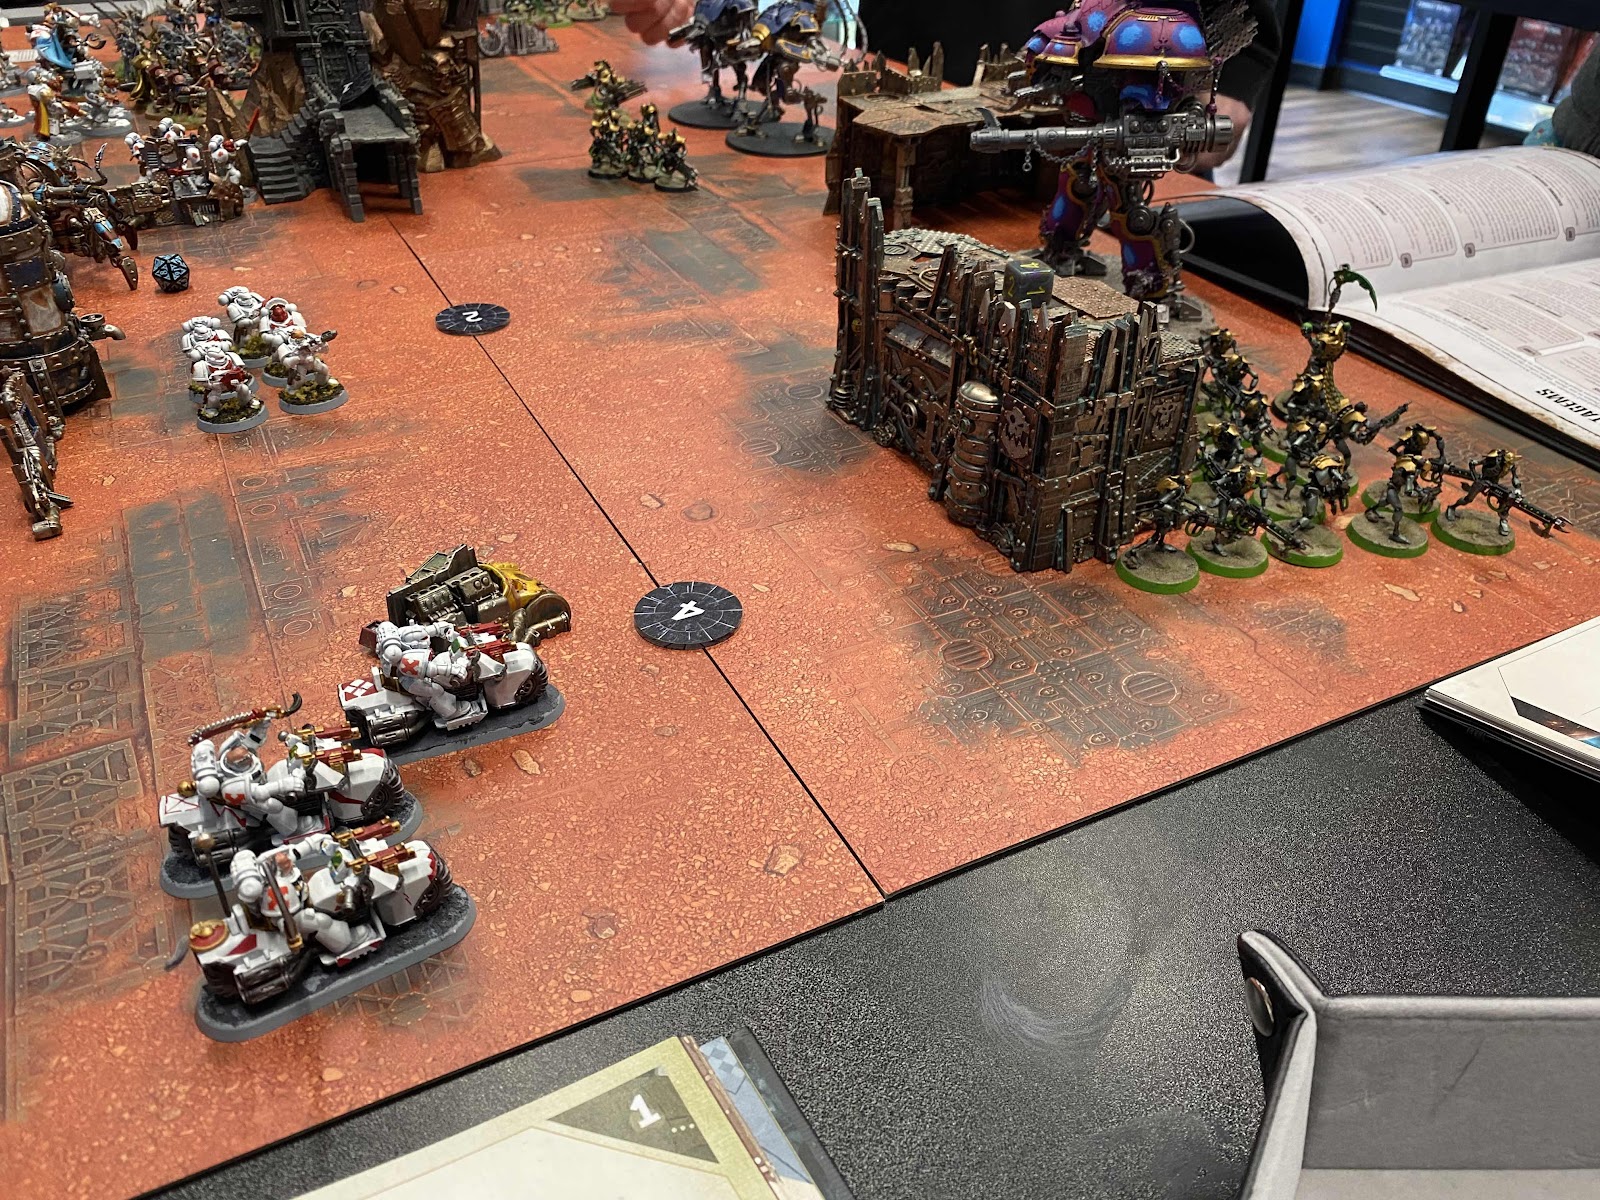
On the enemy's first turn, the Knights moved up.


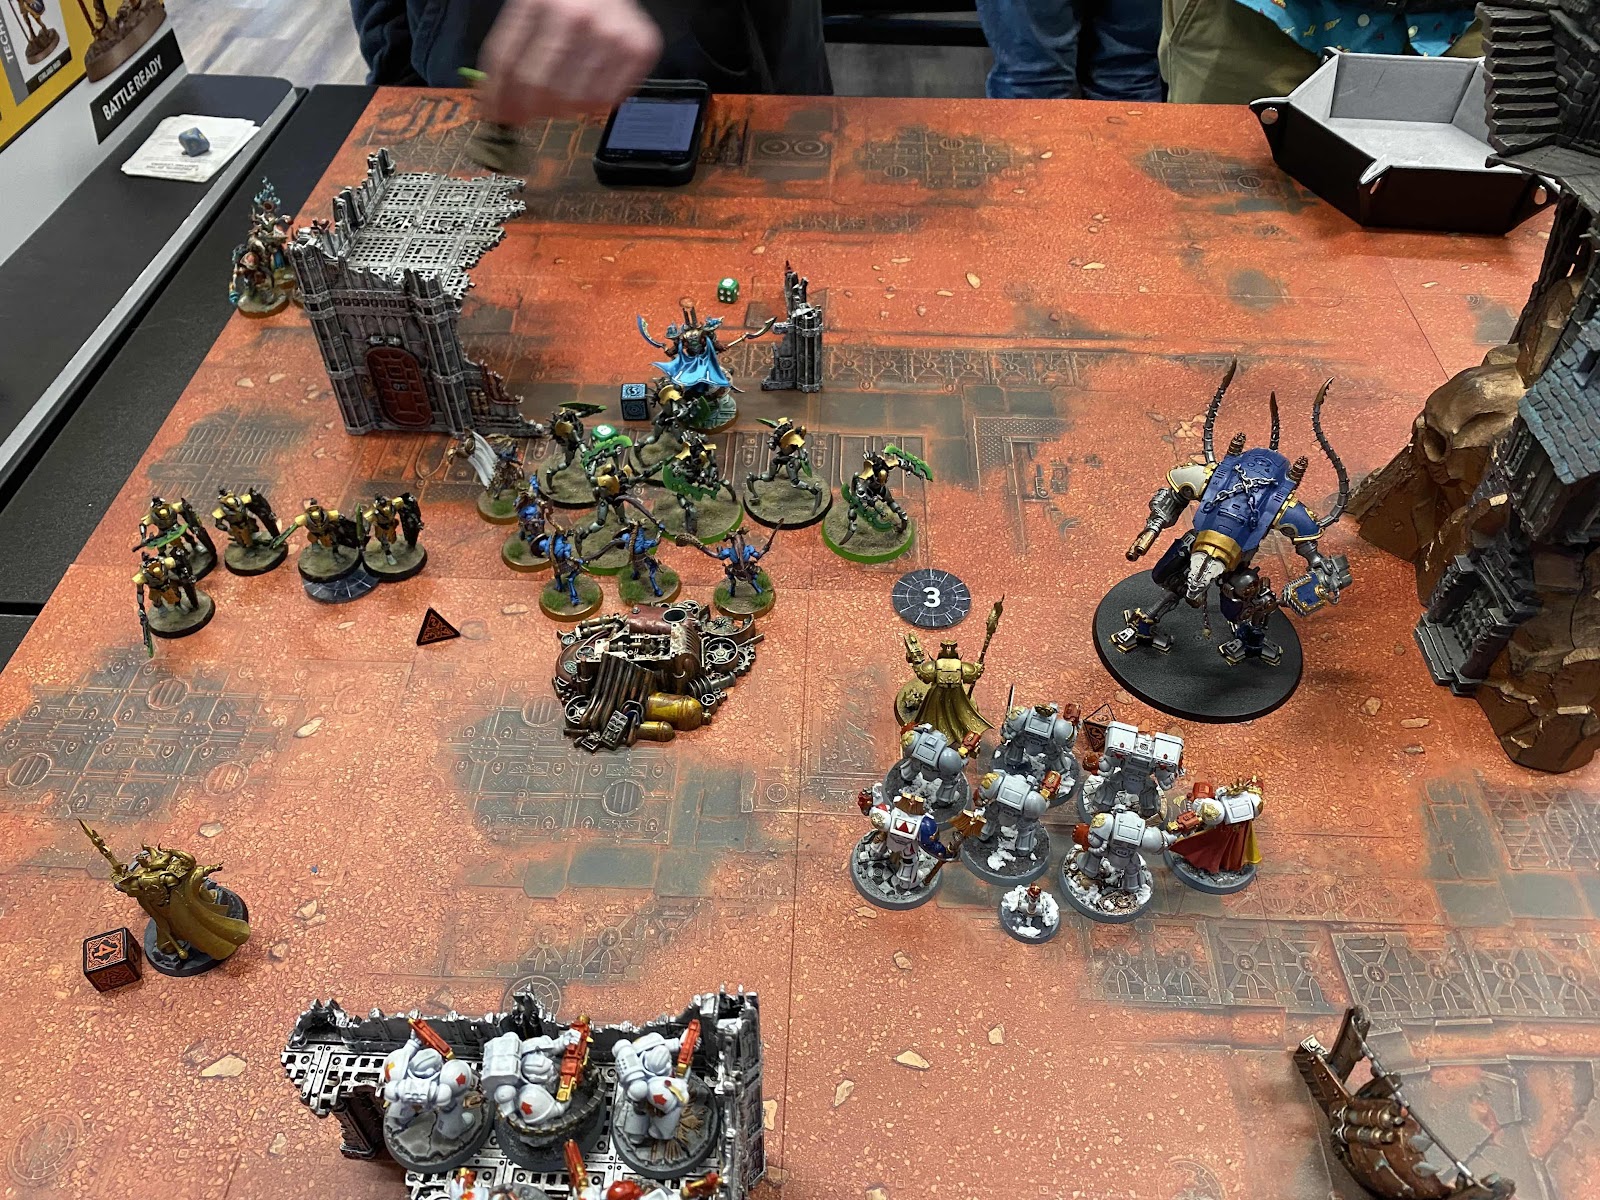
As did the Skorpekh and Lynchguard and necron warriors.


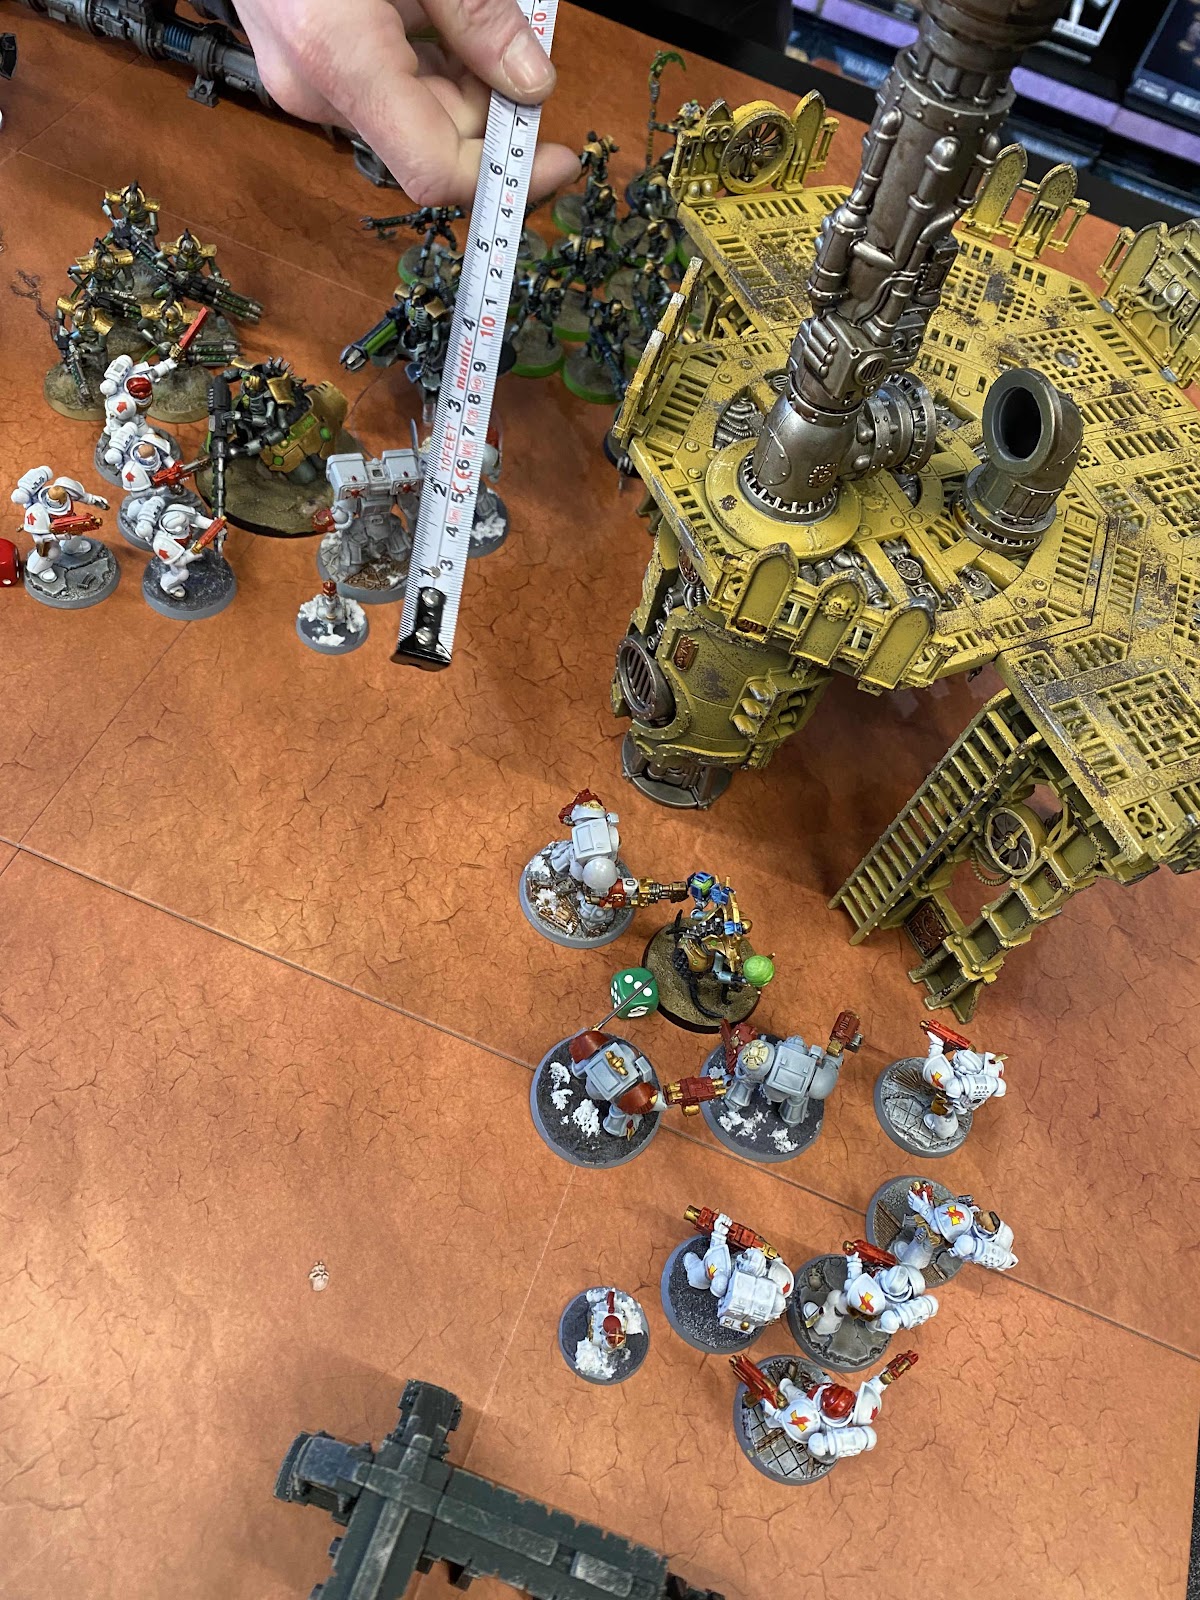
The Defiler and my combat squads look small beside the Knight Tyrant.


The War Dogs went melta-crazy on my Centurions, killing two of them. The necrons' Chronomancer killed the third. New unit curse confirmed! There went a lot of our answer to the Knights! 


The Tyrant then charged one of my combat squads and stepped on them in combat.


My bike squad has also been mostly wiped out by the Tyrant and nearby necron warriors' ranged attacks.


Back in our turn, I double up on mortal wounds spells with my Librarian, and the Thousand Sons also chip in some, and we burn down one War Dog. 


My single biker moves over to maybe distract the Tyrant or chip away at one of the necron units nearby.


In combat, my Terminators do what they're paid for, and get to work with power fists on heavy armor, killing the other War Dog.


I choose to charge my biker into the nearby unit of Immortals, and the Tyrant Heroically Intervenes into him. I think I killed a model or two, but the Knight smooshes the biker.


Terminators are saying, "Yeah, you just mosey on over here and see what we got for you."


The Tyrant decides to instead charge into another combat squad who were on this objective by it.


If they'd have survived, I would have used a melta bomb on it...


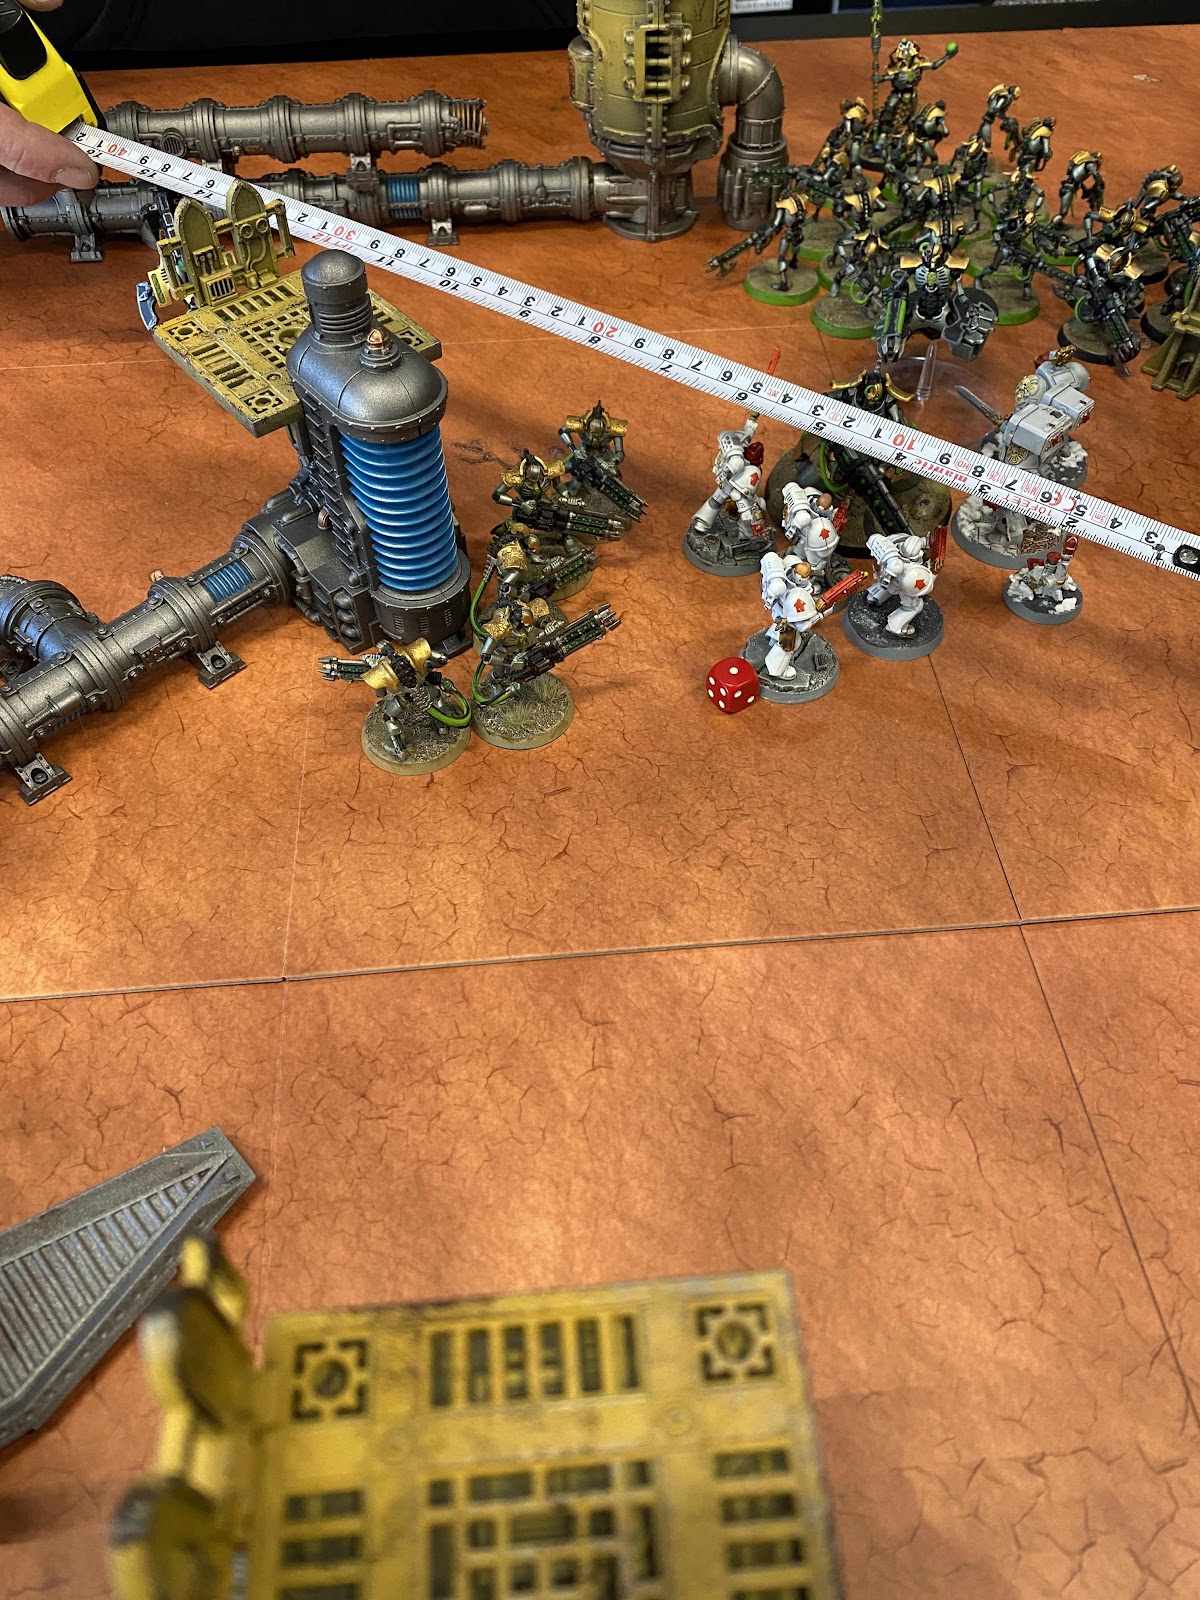
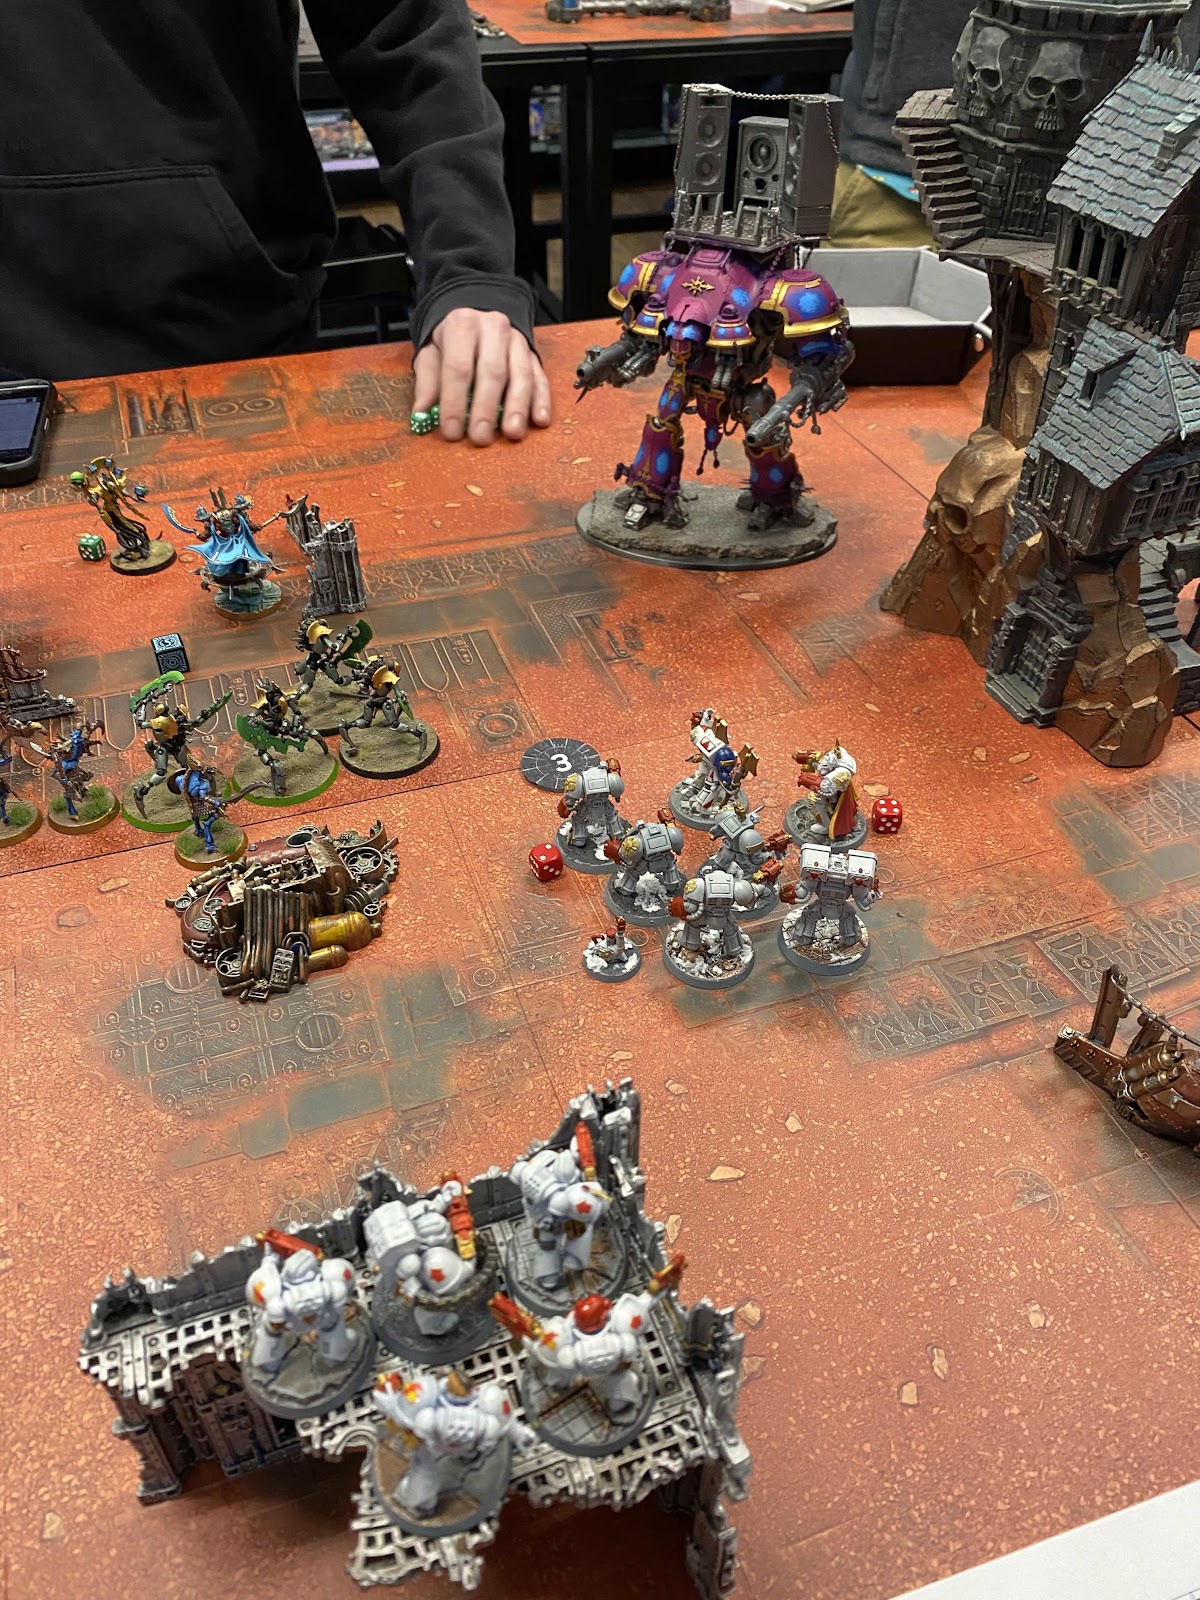
In my third turn, it's now Assault Doctrine, and the Terminators and Captain have flown across the board and into combat with the Tyrant. 


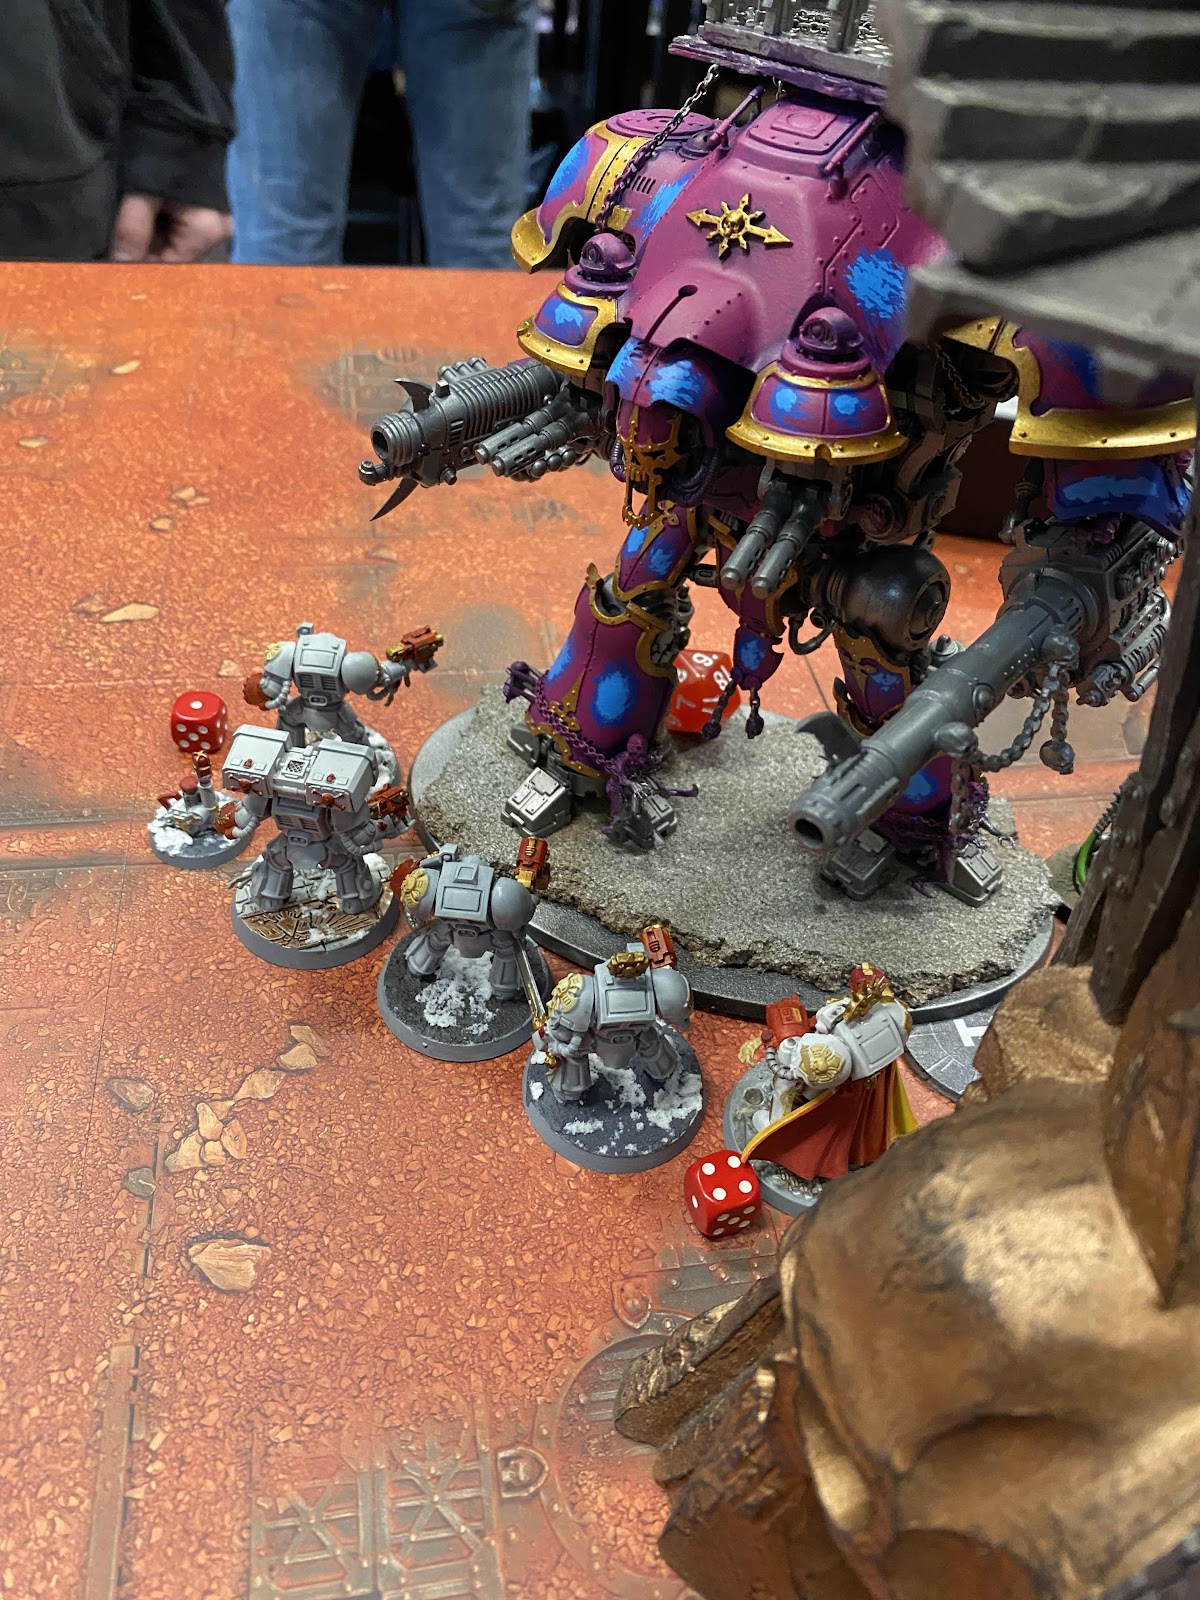
The Tyrant takes 18 wounds from my Terminators, but kills three in return, then tries to fall back.


I use the Butchered Quarry stratagem to pursue with my Captain, so he can't get too far away.

On the enemy's fourth turn, the Tyrant charges my Captain again, and kills him, but! I saved CP, so Only in Death Does Duty End, and my Captain fights back, dealing the final 9 wounds to kill it right back! 


In the end, we have tabled the Knights at least, though there are still more necrons around. They win on VP, probably. We called it a little early, but that's how it looked like it was going. My Captain actually got the final blow on a War Dog as well as the Tyrant, so he was awarded Marked for Greatness this game. 

Too bad the Centurions couldn't contribute much this time out, but they did each soak up a meltagun and thermal spear each from the War Dogs, and another meltagun equivalent from the Chronomancer.

The Thousand Sons did a lot of fighting with the necrons throughout, but I was not really involved too much in those skirmishes. Though that combat squad that was in cover ended up charging and finishing off some Lynchguard in the fourth round.

By the end of the game, I think there were two small and depleted squads of Rubricae and his Infernal Master left. I'm not sure what was left of the necrons, but I imagine some Immortals and some warriors and probably a Skorpekh or two, as well. Maybe even his Overlord and Chronomancer, also.

Saturday, April 16, 2022

White Scars vs Necrons 4/15/22

This round of the Octarius Crusade saw my White Scars of the Invaders faction facing off against the Necrons of the Attackers faction. There's a third faction, the Defenders, as well. We played at 50 PL, the Incursion mission The Relic from the 9th Edition core rule book.

White Scars:
Librarian in Terminator Armour
Tactical Squad of 5 Marines x2
Terminator Squad of 5 x2
Land Speeder Tornado
Devastator Squad of 5
Drop Pod

Necrons of an Ancient Dynasty:
Overlord
Chronomancer
Necron Warriors unit of 20
Immortals unit of 5 x2
Skorpekh Destroyers unit of 6
Lokhust Destroyers unit of 2 with a Heavy
Tomb Blades unit of 3

The Necrons' special rules allowed for a pre-game 6" movement and for them to add 1 to every charge roll. I know my opponent, Shane, was using Command Protocols each round, or at least he let me know what they were in the first two or three rounds. I don't recall which he used when or them ever being crucial to what was going on. Conversely, the new Armour of Contempt rule from the new Balance Dataslate was a very nice assist to my marines this time out. 

After meeting up to play, it was apparent I'd be playing on the board with the Sector Mechanicus terrain for the third time in a row. This particular mission has a rule that prevents any terrain from being within 6" of the center of the board, so the lack of light cover (dense cover was to be had if you wanted it) was somewhat to be expected. I managed to put a ruin on my half of the board, but it never was relevant, as things turned out.

The mission was determined, as was who was attacker or defender in the battle. The Attackers were the attackers, as luck would have it, and the Invaders were defending. So, when we got to the deployment stage, I went first, announcing that my Drop Pod was high in the skies, carrying a Tactical Squad and my Devastator Squad. I believe his first unit were the Lokhust Destroyers. I followed up by placing a Terminator Squad in the middle of my deployment zone, behind dense cover. To which, he responded I believe by placing his Tomb Blades. I put down my second Terminator Squad so that there was terrain between them and his Lokhust, but such that his Tomb Blades had a clear shot. Bait. I think this is when he then deployed his 20 Warriors. I put down a Tactical Squad behind the second Terminator Squad, so that the heavy bolter would have line of sight to the Warriors. He then put down something else, maybe his Skorpekhs. I put my Land Speeder into Outflank using the Encirclement stratagem. He put down something else. I put down my Terminator Librarian HQ with one of the Terminator Squads, but so that he was shielded by them (Look Out, Sir). With that, I was done, and he was free to play his remaining units. Below are pictures of each army deployment.


Shane won the roll off for first turn, and the first thing he did was his beginning-of-game free 6" Normal Move for his entire army. Basically everything moved up, since the name of the game in this mission is to reach the single objective (the relic), peform an action to take it into possession, and hold onto it for the entire game. 

The free movement along with going first meant that his 20 strong unit of Warriors got right up to it and was able to do the action in the first turn, so he immediately was off to a good start. With the rest of his first turn, he used the Chronomancer's relic to teleport him and the nearby unit of Skorpekhs up the board to a point 9" away from my Terminators on the right flank, and to move up his Tomb Blades to screen, and to shoot with both them and the Lokhust. Right away the new Armour of Contempt rule saved me a few wounds, and I had only lost two off a single Terminator by the end of his turn.


In my first movement phase, my Terminators all move up their 5 inches, and my Drop Pod comes down on my left flank, whereupon my Devastators and Tactical Squad all hop out, precisely 9" away from the Tomb Blades.


I have put Adaptive Strategy on one Terminator unit, to make it attack as though all three doctrines were active for that battle round, knowing that would be a cinch to move up 5" and then charge 4" into the Skorpekh that turn. 

In my Psychic phase, I use the Stormseer Librarian to Smite the Skorpekh, and he turns out a roll of 11 for a super smite, which results in 5 mortal wounds! Nearly kills 2 of them, right off. I probably should have followed that up with the other damage power, but instead I put Ride the Winds on my other Terminator Squad, so that I could add 2 to their charge roll, reasoning that a higher likelihood of getting them into combat would probably result in more wounds, all told.

In shooting, I go around each squad putting all the S4 bolter shots into the big unit of Warriors, and pretty much everything else into the Skorpekhs. Everything else being Grav Cannons and Multi-meltas. The Devastators disappoint me a little here. I think they finished off a second Skorpekh, if even that. About 5 Warriors are killed. His Warriors have a 6+ Feel No Pain, which is from Grizzled, a Crusade buff. This is in addition to their 5+ invulnerable from the Chronomancer, and the Reanimation Protocols as well, so most of the game to kill a single warrior he has to fail a 5+, then a 6+, then another 5+ but that re-rolls 1s, of course. So, they are incredibly resilient. 

Here I make a couple of mistakes. One ends up being very costly, the other maybe not so much. First, I forget to shoot with my Tactical Squad in back with the heavy bolter. I purposefully left them still so they'd not have a penalty and also have bolter discipline at the Warrior blob, but completely spaced them. Then, when all my charges are going off right and left (I even made the 9" for the one Tac Squad, unassisted), I leave my Librarian out in the open... and then he fails his Charge that would have gotten him into combat, at least.


In the Fight phase, I go first with my Terminator Squad that is in all three doctrines. I think they mostly whiff (he used the -1 to wound stratagem repeatedly on these guys), because when he interrupts with Counter Offensive, he's still got 4 Skorpekhs fighting, which he puts into my Terminator Squad that is yet to fight, and that kills three of them. They then do fight, killing one Skorpekh in return. My Tactical Squad that charged the Tomb Blades also fights, and does a wound or two. 


That's my first turn, and in his second, he takes his ball (the relic) and runs home with his big Warrior blob, which is still at about 15 models, and then, to make matters worse, he puts a bunch of speed bumps in my way to slow my chasing.


Next up, it's time to punish my reckless charging and leaving my HQ alone.


It takes basically all of his shooting from the Tomb Blades, Warriors, and Lokhust. I had a clutch 5+ save after a CP reroll against his Heavy Lokhust's gun, which would have been 3D3 damage had I failed. However, I am justly chastised when in the end my Stormseer is disintegrated by a hail of gauss blasts.


For the Fight phase, it's his turn, meaning I get to go first! I fight with my still buffed triple doctrine squad, and kill another Skorpekh. When he fights back, I lose a couple of that squad.


Then, I fight with my other squad, and kill another of his, so that he's then down to just one Skorpekh.

On my second turn, I fall back from combat with both Terminator Squads. One moves up the board in the direction of his Lokhust, while the other just moves sideways a little to open up the remaining Skorpekh to be shot. My heavy bolter Tac Squad moves up. So does the other Tac Squad, also toward the Lokhust. Devastators stay put. The Land Speeder comes on from Outflank over on my right side, practically in my deployment zone. He's screened out the backfield pretty well. There was technically room to come in behind him, but I judged it as probably suicidal to do so. This way, I could free my Terminators up from killing Skorpekh, and let the Speeder potentially finish them off.

The next pic I have is from way later, after charging and combat, so it's hard to say exactly what happened in what order, I know the Skorpekh died. It was the Terminator Squad, with the chainfist, by the Sector Mechanicus terrain. At this point the Chronomancer has also taken a few wounds, likely from the speeder and nearby Tac Squad in shooting (he wasn't protected by the single Skorpekh).


The pic below was taken immediately after the one above. I think this turn was when my Devastators opened up on the Tomb Blades and killed two of them, as well. 


Here he has moved a squad of Immortals up.


In this pic below, you can see I have hit on a new signature White Scars technique--the advancing but full firing Devastator Squad, made possible by Hunter's Fusillade, one of my favorite stratagems. You can treat the unit's Heavy and Rapid Fire weapons as Assault for a turn. It's not great for the Rapid Fire ones, but it's aces for the Heavy ones! 

I have also flown the Speeder up onto the terrain, giving me a shot at the big Warrior blob, which still in round 3 has the relic. His Lokhust have fallen back and my Tac Squad they had tied up has advanced over by the pipeline, ready to charge through it into the Warrior blob. You can see he's put his last Tomb Blade and both squads of Immortals out for me to roll over on my way to kill his Warriors.


The Chronomancer gets executed, and one squad of Immortals gets devastated while my Terminators smash up the Tomb Blade and a couple more Immortals. 


Meanwhile my Tactical Squad has gotten around, killed another Warrior or two, but then been mauled by his Overlord.


By now it's the final round, and he's managed to hold the relic the entire game with his undying Warriors, while I have rolled up all the rest of his army but the Overlord. Said Overlord killed by one Tactical Squad, the only other unit to be destroyed besides my Librarian. They died valiantly.


So, in the end the cowardly and treacherous Necrons make off with the relic and the win. The prey has eluded the hunter in this instance, but it's badly wounded.

While it wasn't a win, it's a game I can (mostly) feel pretty good about. I think I could maybe have pulled out a win if I hadn't messed around and gotten my mortal wounds engine killed so early on... in this mission possession of the relic at the end of the game is worth more than having held it in every other round combined, so it could have happened. 


In the aftermath, both of my Terminator Squads gained the first level, and I just flat chose (didn't roll for) the Bladesman's Honour bonus, to give them +1 WS, to counterbalance the -1 to hit from their Power and Chain fists. Nowhere that I have seen in the packet made by the league organizer is it stated that anyone is expected to roll for battle honours, so I'm not going to handicap myself (anymore than I do by my list building).


Saturday, April 2, 2022

White Scars vs Beast Snagga Orks 04/01/2022


The list I'd planned on playing tonight. It came to 48 PL and 995 points of nothing but Terminators. It was perfect. Captain, Ancient, three regular Terminator squads, and one of Assault, all Lightning Claws. I didn't realize though, that tonight was the kick-off of the 25 PL Crusade league being run by one of the store regulars, Sam.


I knew this would be happening, just not when. Sam had asked me two weeks ago if I'd like to participate, and I said sure, if possible. So, I get to the store today shortly after 4:00, and Sam is there and says, "Hey, we're kicking off tonight, can you play at 25 PL?" So I think about it for a moment and realize that yeah, I can use my Captain who is 6 PL and two of my squads, which are 9 each, and that comes out to 24 PL, so that will work.


It won't technically be a Patrol detachment, but no big deal. My opponent doesn't mind. He's got 24 PL of Beast Snagga Orks he's looking to play with, which looks like fun to me, so we're agreed. This guy's name is Austin, and I've definitely seen him at the store several times before, and I am pretty sure I played him back when I first got into the game, in 2019. I'm pretty certain he was the one with those metallic purple necrons I fought with my Guard army that one time. He's a pretty distinct looking fellow and I have a pretty sharp memory, at least for certain things.


Sam lets us know the mission of the week is... here I've forgotten what it's called, but it's one of the Combat Patrol level Crusade missions in the core book, where deployment is on the short sides of the table, and there's a defined strip down the center of no man's land where a couple of objective markers have to be placed. The other two are in each deployment zone. I'm the attacker, so I need to, as a side objective, get over to his edge of the board for VP at the end of the game. Objective control is sticky in this mission, meaning you can move off them and still control them until the other force comes to take them.


The forces are:
White Scars Terminator Captain
Terminator Squad with chainfists and heavy flamer
Terminator Squad with power fists and cyclone missile launcher


Goff Beastboss
Beast Snagga Boyz
Squighog Boyz
Kill Rig


Orks are defending, so they begin deploying first, with a unit of Beast Snagga Boyz. I put down a unit of Terminators on the objective in my DZ behind light cover (fuel pipe). He deploys his Kill Rig across from them on the same flank. I put down my other unit of Terminators behind dense cover (sector mechanicus scenery). He puts down a unit of 3 Squighog Boyz near the other Boyz. I think for a moment about where to put my Captain, and settle for by the Terminator squad with all chainfists, because I am going to want to use them to kill the Kill Rig since they buff up from D3 to flat 3 damage when attacking Vehicles. He puts down his Beastboss between his two units of Boyz of different types.

2022-04-01 16.33.23.jpg

On the roll off for first turn, he wins it, but chooses to go second, so I'm starting things off. I advance my Captain up toward an objective in no man's land, as well as the chainfist/flamer squad, up into the Dense Cover. The power fist/missile squad also advance, but roll a 1, meaning 6 inches total, 2 of which is spent going across the pipes. I use Hunter's Fusillade on them so they can still shoot; I'll be treating the heavy and rapid fire weapons as assault.


The Captain has a combi-melta, but is too far away to fire the melta at the Kill Rig. I forget to fire the bolter half of his gun. Oh well, it's T8 anyway. I fire the storm bolters and missiles of my one squad at the Kill Rig and get a lucky missile strike for 5 damage. A Kill Rig has 16 wounds, to begin with. End of my turn.
2022-04-01 16.44.07.jpg

In the Orks' first turn, the Kill Rig advances up to right by my Captain, the Beast Snagga Boyz and Beastboss also advance up toward my squad in the cover, and his Squighog Boyz move laterally to... I'm not sure what. Be behind the light cover maybe. There's no reason for them to actually move over to that objective in his DZ, since he should have already had control over it from the Boyz that had been on it.


He does 2 psychic powers with the Kill Rig (the Wurrboy on the back of it), Smite and another one, which together do 5 mortal wounds to my Captain, putting him down to 1 wound left. His Orky psy power also affects my other units nearby, and each take 1 or 2 mortal wounds, also.


Shooting, he kills one Terminator from the missile launcher squad, but I think that's it. When he charges, the Beastboss fails an 8" one, despite a free re-roll (Goffs). The Kill Rig charges both my Captain and missile launcher squad, though.


Fighting, the Kill Rig has a total of 14 attacks. 6 stock, and 2 other weapons that each do 4 attacks additional when it fights. He kills my Captain and I think one more Terminator. My squad fights back, 4 power sword attacks and 6 power fist attacks, and one fist gets through, so now it's down to 9 wounds remaining. My squad passes morale, and it's back to me.


I'm now in Tactical Doctrine, so I fall back with the squad fighting the Kill Rig, and use Feinting Withdrawal on them so they'll be able to shoot. I put all ranged from both squads into the Rig, then charge both squads into it and after combat, it's dead. It doesn't explode. Here's it being removed.


Then it's back over to his second turn, in which he moves up his Beastboss and Beast Snagga Boyz and Squighog Boyz to where they'll be in charge range.


Between his shooting then and the charging and fighting that follows, he kills my whole squad of chainfist/flamer Terminators. I overwatch with the heavy flamer of course, but I think it only does one damage to the Beastboss as he's inbound. Pic of the beatdown in progress:


After the Squighog Boyz fight, though, he consolidates them into my remaining three models, and I then kill two of them in my own fighting since they came too close. When it comes back to me for turn 3, I'm in Assault Doctrine. I fall back with the three remaining Terminators in the direction of his Beastboss, and again use Feinting Withdrawal so they can shoot. They put everything into the Beastboss, then charge him and put all their swings into him, as well. However, he is -1 to wound, so even my S8 power fists are wounding on 4s, and the power sword is wounding on 6s only. I do a few damage, but he doesn't die. He fights back, killing one of my Terminators. Now I'm down to 2.


In his third turn, I'm now surrounded and he's got a stratagem to ensure the pounding.
And that's a wrap! It may not have been ideal battle, but it was fun enough, and I was proud to take down the Kill Rig. I do think it could have gone pretty differently had my Captain not been blasted with 5 mortal wounds right off the bat. That's what I get for not having a Stormseer along for the Deny, I guess. I need to paint up that Terminator librarian I have. I forgot to mention it, but somewhere in there he used a suicide squig bomb (comes with the Squighog Boyz unit) for another couple mortal wounds to one of my squads, as well.


I think this was my first time ever playing Orks, period. I didn't really notice the high Toughness of the Boyz because I was mostly focused on the T8 Kill Rig and the Beastboss who is T6, himself. His Beast Snagga Boyz didn't do a whole lot, either. They suck at range with low BS. I think they chipped in a few wounds in melee, though.


So I guess I'm officially in the Crusade league now as White Scars. I'm in contact with Sam now, so next time I'll come with a purpose-built list for it at whatever the PL will be. What I'm doing is taking my existing Scars Crusade force, and just zeroing out the XP and battle honours on the units I want to use for this new one, but also giving myself one RP for each 1 Crusade Point of battle honours and stuff I erase, for the purposes of expanding the supply limit to get more stuff in the (original) list. This way I can both advance my edition-long Crusade force but also start this new one on an equal footing with the other people playing who have not already got 30 games worth of XP under their belts.