Monday, September 27, 2021

White Scars vs Astra Militarum 09/25/21

I have just added my Land Raider Proteus to my White Scars crusade list, and I wanted to play a vehicle-heavy game, so I broke out all of their heaviest units from the list and formed a Spearhead detachment, which I then put up against one from my Astra Militarum list featuring all of my tanks, allied with my Imperial Knight Freeblade.


Above is the White Scars force, featuring plenty of Lascannons, Melta, and Power fists to smash up T8 hulls.


Said collection of T8 and T7 hulls, along with a couple of infantry squads to go in the Chimeras, and a heavy weapons squad of three Autocannon teams.


This mission is remarkable for the 12" circle in the middle of the field where no invulnerable saves can be taken.


The black rectangular thingy in the center of the image above represents the centerpoint of the battlefield.


White Scars deployment above. Ironclad Dreadnought and Devastator squad on the left off the field are embarked in the Stormraven. The other Devastator Squad is in the Land Raider, and the Terminators are in a Teleport chamber.


Guard deployment. The two infantry squads at the bottom are in either Chimera.

WS Win the roll-off, and go first.

No VP are awarded in their first turn. Devastators hop out of the Stormraven, which flies over near to where the Autocannon teams are. Bikers and Speeder move up to take shots at tanks. Predator and Land Raider move to get line of sight on other tanks.

Multi-meltas and missiles from the Bikers, Speeder, and flyer all take out the white Leman Russ Punisher. Massed hurricane bolter fire from the flyer kills the Autocannon teams. The Stormraven also blows up a Chimera, and two infantry squad are killed jumping out of it.


The Predator is unable to wound the Imperial Knight Freeblade, which has rotated ion shields and now has a 4+ invulnerable save.

The Land Raider brings the Leman Russ Battle Tank down to 6 wounds remaining.

Devastator squad brings the Leman Russ Eradicator down to only 2 wounds remaining.

The Valhallans who lost two models when the Chimera exploded pass Morale.


This Predator only had line of sight to the Knight. 

In the Astra Militarum first turn, they get 15 VP for control of the middle of the board Search Zone, which is apparently something you can score in the first round, unlike other objectives.

They then regenerate a few wounds on the damaged tanks.

Tallarn squad disembark their Chimera and move over to a nearby objective point. Their Chimera then moves up to fire at the Devastator squad, but ends the move just a tad outside of heavy flamer range. The Tank Commander positions himself between the other two Russes to issue orders to both. The Knight circles the Null Zone area, intending to make his way over to where the Predator and Land Raider are.

Primaris Psyker buffs the infantry squad with him, then Smites the Stormraven for a few wounds.

The Chimera and Russ Eradicator together kill the Devastator squad on that side of the board. 

Combined shooting from the other tanks and Knight bring the Stormraven down to just 1 wound remaining. The Land Speeder loses one wound from the Knight's heavy stubbers, as well.


At the beginning of the White Scars second turn, they score 10 VP for being on objectives.

Ironclad Dreadnought is dropped off by the Stormraven, which then flies over into the Guard's backfield. The Land Raider moves up and the Devastators inside Lightning Disembark out of it and move over to some cover and near to an objective. Terminators Teleport Strike into the Guard's backfield, 9" away from a couple of their tanks.


Shooting from the Terminators, Stormraven, and speeder eliminate the remaining infantry and psyker on one objective. The Chimera and Russ Eradicator are taken out by the Devastators and Predator. The Land Raider puts a few wounds into the Tank Commander. The Ironclad adds a few with his hunter-killer missiles and meltagun, and takes a wound off the Commissar with his heavy flamer. Bikers also kill a couple Tallarn with boltgun fire.

The Terminators pull off a 10" charge into the Leman Russ Battle Tank and smash it to bits with their Power fists. The Ironclad charges into the Tallarn squad and kills three of them. The Commissar with them fights back and takes a couple of wounds off it. 

In Morale, a couple more Tallarn models run away. 

Guard turn two, no VP are scored.

Tallarn and Commissar fall back onto the nearby objective.


Knight moves around the building to get close to the Devastators.

Tank Commander fires at the Terminators who have consolidated into him, killing two.

Knight fires heavy stubbers at the Devastators, killing one.
Fires the Rapid Fire Battle Cannon at the Predator, missing most shots, resulting in only 3 wounds.

The Knight charges the Devastators and kills them all with his chainsword. Then consolidates into the Land Raider.

The Terminators fight the Tank Commander and kill him.

White Scars third turn, they score 15 VP from controlling the search zone, and another 15 for controlling the objectives around the board. 

Land Raider falls back from the Knight, using Feinting Withdrawal so it can still shoot.

Terminators and Land Speeder pick off the remaining Commissar and Tallarn infantry.

Everything else opens up with ranged into the Knight, bringing it down to 16 wounds remaining. 

Khan on Bike and Ironclad charge the Knight and finish it off between them. The Khan deals 9 wounds with his spear, and the Ironclad deals another 12 with his combat weapon.


With this, the Guard force is completely wiped out, and the White Scars have fulfilled the Angels of Death Agenda for massive XP gains all around.


Thursday, May 20, 2021

40K Solo Play

 I thought I should write up my solo play method. Based on some social media posts I've seen, apparently there is a need for it!
 
It’s fairly simple, of course, but breaking it down might help show people how it’s possible to do, if you are willing to go to the trouble. I get the feeling a lot of people are very excited to play more games but frustrated by the pandemic. This is aimed at the everyman (or woman, of course) player of 9th edition 40K. Not that the system matters all that much, but there may be some particulars that would need adjustment for use with Age of Sigmar or Flames of War or what-have-you.
 
I play Crusade mode, but this method should work fine for Matched/GT/Open mission sets, as well. I’ve actually generated Open missions to play using Crusade. I’ve done that borrowing a mission reward (determined by rolling a D6, usually) from one of the Crusade mission sets for Combat Patrol/Incursion/Strike Force.
 
The first thing I do is decide which two armies I want to play. I almost always play my White Scars because I want to keep earning RP for them to keep adding stuff to their Order of Battle. Often I’ll rotate my alternate forces to match up against them. My options on hand are Astra Militarum, Ultramarines, Word Bearers, Red Corsairs, Sons of Omegon (custom Primaris-only chapter), Talons of the Emperor (Adeptus Custodes with or without Sisters of Silence), and Imperial Knights. Lately I’ve been going with the Astra Militarum for several games, again because I want the RP to keep filling out their force with stuff I have already painted.
 
Next up I’ll decide how big a game I want to play. Often this is determined by the opposing force I choose, because many of them are only filled out to the size of a Combat Patrol or Incursion game. Sometimes I’ll play the biggest game possible between two factions, matching the PL as nearly as possible. Sometimes I’ll choose a 25ish PL list from a larger Order of Battle just to do a relatively simple and quick Combat Patrol game. Similarly, I might do an Incursion game where I only take an Outrider detachment of my White Scars. Thematic lists can be very fun when you can also tailor the opposition to allow for a well-matched game.
 
Next comes the list building stage. I’ll typically have it in mind to play a game with a force of nearly all White Scars bikers, or a list of nothing but Leman Russ tanks. I’ll begin with some concept like that for one of the factions above, build the list, and then choose another faction and build a list that is somewhere between a perfect foil for the first list and a takes-all-comers list for the faction. Like a real opponent probably should, knowing roughly what they would be facing. If my first list contains two big tanks, then the list to go up against it should have a few heavy weapons or comparable anti-tank component to it, without being exclusively composed of tank hunter units. If the first list is all infantry, then there’s probably not much need for a bunch of Devastator Squad with Lascannons and Multi-meltas. I might build in Heavy Bolters instead, or an Assault Squad instead of Devastator Squad. This is a pretty subjective and ‘season to taste’ part of the process.
 
Now to the practical logistics of playing. I set up the table. We have a decent-sized dining table that is about 53.5” x 35.5” with leaves that extends out to about maybe 90” x 35.5”. A 30” x 44” battlefield for Combat Patrol or Incursion is a nice fit. If I want to do a 60” x 44”, then I bring out an ironing board and a couple of extra flat wooden boards to run alongside the table to make that extra 8.5”.
 
I use F.A.T. mats and Gamermat.eu mats and GW cardboard killzone surfaces in the various sizes, and a bunch of GW terrain in the various Imperialis and Mechanicus ruins styles. I find the mats and painted terrain add a lot to the immersion in the game, and using a lot of pieces allows for almost endless variety in the map setup. I tend toward maps that are symmetrical in terms of the line-of-sight-blocking terrain present, if not perfectly geometrically symmetrical. I tend toward denser terrain layouts, also, though I do try to leave one or two long fire lines available. All this is done before deployment or table sides are determined.
 
To keep track of CPs, Victory points, and what battle round the game is on, I make up a dice UI to use. Each side gets a D20 to show their CP count, a couple of D10s to use to keep track of victory points, and there’s a single D6 with numerical faces to show what battle round it is. I grab the stratagem cards for each faction and leaf through them pulling out the ones I might use for that specific list, then put the rest back in the box. My last game, I only pulled about 5 cards for the Astra Militarum, not counting the Orders and Psychic Powers cards. If I’m playing Space Marines, there are also the Chapter Supplement stratagem cards, the Doctrines cards, and the Litany cards, if applicable. I get all these out and prepped to use, off to the side of the battle mat on each table side. One army gets the left side of the table off the mat, and the other army gets the right side.
 
I also keep the Core Book handy when I’m playing, mostly to reference the rules for the specific mission that I’m playing out both sides of. For referencing rules, as necessary, I use the 40K app on my phone. For referencing datasheets or weapon profiles or unit abilities, battle traits, scars, honors, and the like, I use my homebrew crusade cards. These show all the info from the unit’s datasheet, but then also include the unit’s relevant Crusade info, such as Crusade Points totals, XP totals, kill counts, battle counts, battle traits/scars and what they do, and even a list at the bottom of stratagems can apply to the unit. Melta Bombs would be included in the list for any unit with that keyword in a Space Marines army, for instance. Transhuman Physiology would be in the list for any Primaris units. This is all there so that at a single glance you can learn everything that applies to a unit. They also come in very handy when unit A is interacting with unit X. Did unit A have a battle scar that would mean -1 to hit? Did unit X have a 6+ Feel No Pain type ability from a battle honor? Just check the sheet.
 
When setting up and later tearning down (tracking XP and Crusade stuff), I follow the Crusade mission routine from the Core Book line by line. It’s like a pre- (and post-) flight checklist. Following it closely helps to ensure that no steps are missed, but then later on in the game when your brain is all screwy from figuring out hundreds of dice rolls, you can rest assured knowing everything was done by the book earlier in the game if a question arises.
 
Pretty soon you’re off, rolling a couple of D6s handily color-matched to each side to determine attacker/defender, then you’re deploying each side in turn and to the best of your ability. This is when you first get to start practicing playing both sides to the utmost. Deployment is incredibly impactful in any game of 40K, and if you’re setting up to play both sides, this is when you have to start being on your toes to do the best by each side as possible. Often that might mean trying to hide as many units on both sides as possible! Often it means putting down all the troops units in incredibly obvious places to begin with, so that one side eventually has to start putting down the key units before the other can then react to them by playing its own key deployments. It’s all that stuff you are familiar with from playing against another person, except it’s a mirror match. You may have trouble being impartial, and end up putting the thumb on the scale for one side or another. If that’s the case, or if you think it might be, then step back at the end of deployment and consider whether the other side has left you anything that is too good to be true. If they have, then fix it from their point of view, unless it was as a result of your key unit being one of the last things on the board after they had already exhausted all of their units.
 
Next, the game begins. Command phase, don’t forget to increment your CP. Movement, Psychic, Shooting, Charge (don’t forget Heroic Interventions on the other side), Fight, Morale, and repeat for the other side. It can be tough to remember very situational stratagems, especially for the inactive player, so maybe just concentrate on trying to remember Command Re-roll or the like to burn those CPs. But also, don’t neglect to take advantage of one thing solo play allows for that is otherwise impossible—take a break and come back hours later! Re-wind the clock several phases to make that move you forgot to make earlier for one side or the other! Take lots of photos of the battle!
 
I find the roll progression to be very fast in solo play. Hit rolls, wound rolls, save rolls all using the same pool of dice from beginning to end make it pretty quick to progress if you know all your unit and weapon profiles by heart. What I find I spend more time on than I otherwise might is movement and positioning, simply because I can take all the time in the world to consider, think, ponder, wonder, and ideate all before moving any models. I sometimes also gloss over Crusade traits and scars and stuff because I know unit and weapon profiles but don’t look at the reference material often enough to see that, oh yeah, this unit does get +1 to BS.
 
But, the more I set up and play out solo games, the better I learn all the rules (because again I can take all the time necessary to look them up when a question arises), the more I am free to experiment with themed or skewed lists for fun, and the quicker and more well-versed I become at playing 40K. I use these games for fun narrative play, but I suspect they could also be tuned to use to hone competitive skills and knowledge, as well. It wouldn’t necessarily work for when there are secret secondary objectives, or other hidden information in games, though I think those are pretty rare.
 
When the game is done, all of the Crusade stuff I handle with D6 rolls. Traits, scars, etc. I’ve gone back and forth on whether to take scars or take the Devastating Blow option, but that’s a choice offered to the player anyway. I play enough games that I can handle taking the Devastating Blow and being set back some XP, but I still can’t get enough RP to up my Supply, so of course I don’t want to spend any on removing the really bad scars. I’ve even retired units a couple of times and re-recruited them as separate units with 0 XP to get rid of multiple scars. Again, this is all perfectly legal in the Crusade rule set.
 
Anyway, that about covers it. I’ll say that it definitely does take time and effort to play solo games, but I’ve found it’s worth it, and has allowed me to fairly extensively play Crusade where otherwise I would have 0-1 games played by now!

Tuesday, February 9, 2021

White Scars Vs Sons of Omegon 02/06/21 Strike Force - Ambush

 I’ll try to give a short account of the game I played this weekend between my new Sons of Omegon Crusade Force and my White Scars one.


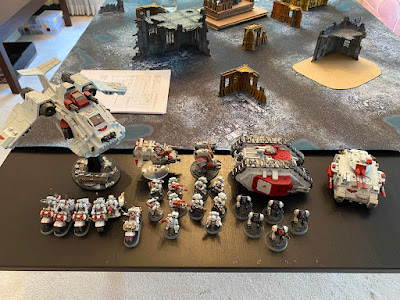
First, who are they? A quick peek at the Order of Battle:


CRUSADE CARDS POWER RATING

Primaris Captain Herkyul 5

Primaris Lieutenant Ifit 4

Intercessor Squad Aldebaran 5

Intercessor Squad Bellatrix 5

Intercessor Squad Capella 5

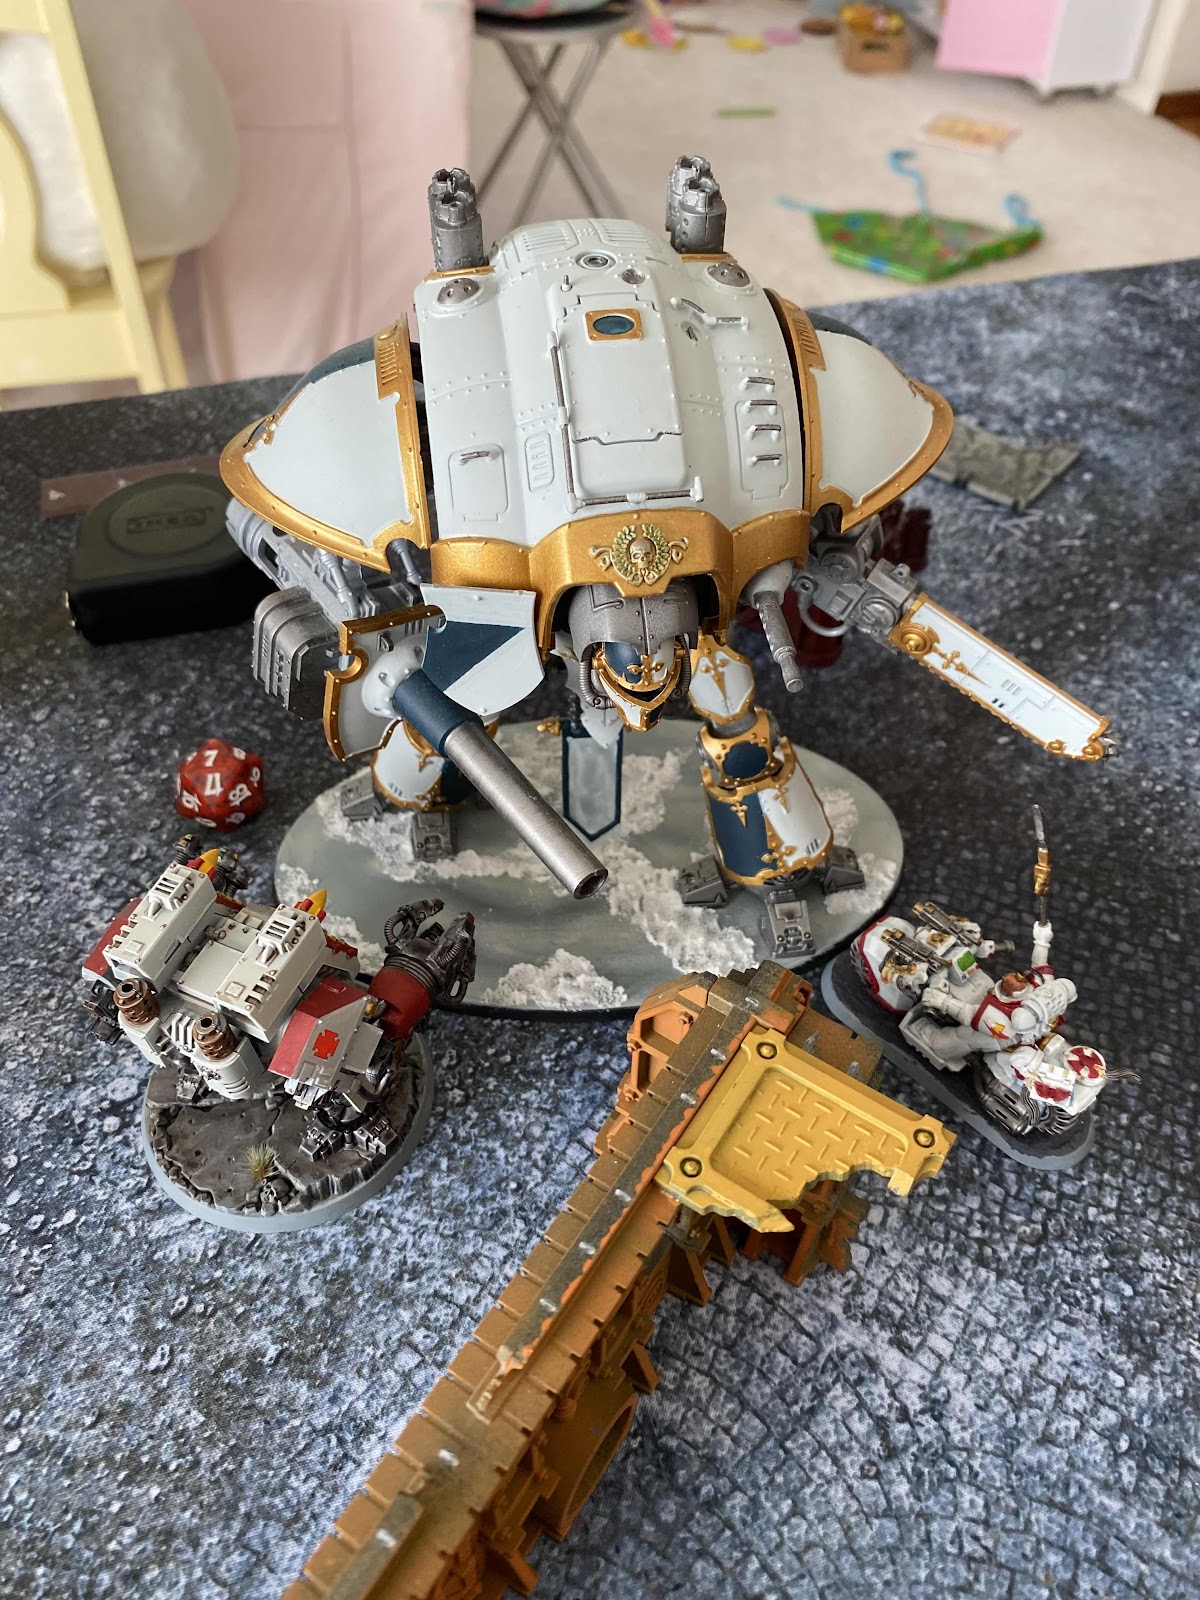
Redemptor Dreadnought Ophiuchus 9


And the Outrider detachment (yes, I did pay 3 CP of their starting 6 for this) of White Scars ambushing them in this mission:


CRUSADE CARDS POWER RATING

Assault Squad Sirocco 6

Bike Squad Drover 7

Terminator Squad Stampede 9

Hibogen Khan - Khan on Bike 6

Land Speeder Tornado Berkut 4


So it was 33 to 32 PL, which would usually be an Incursion size game, but I wanted to play the final Strike Force mission that I had not, so I just took that one and modified it.


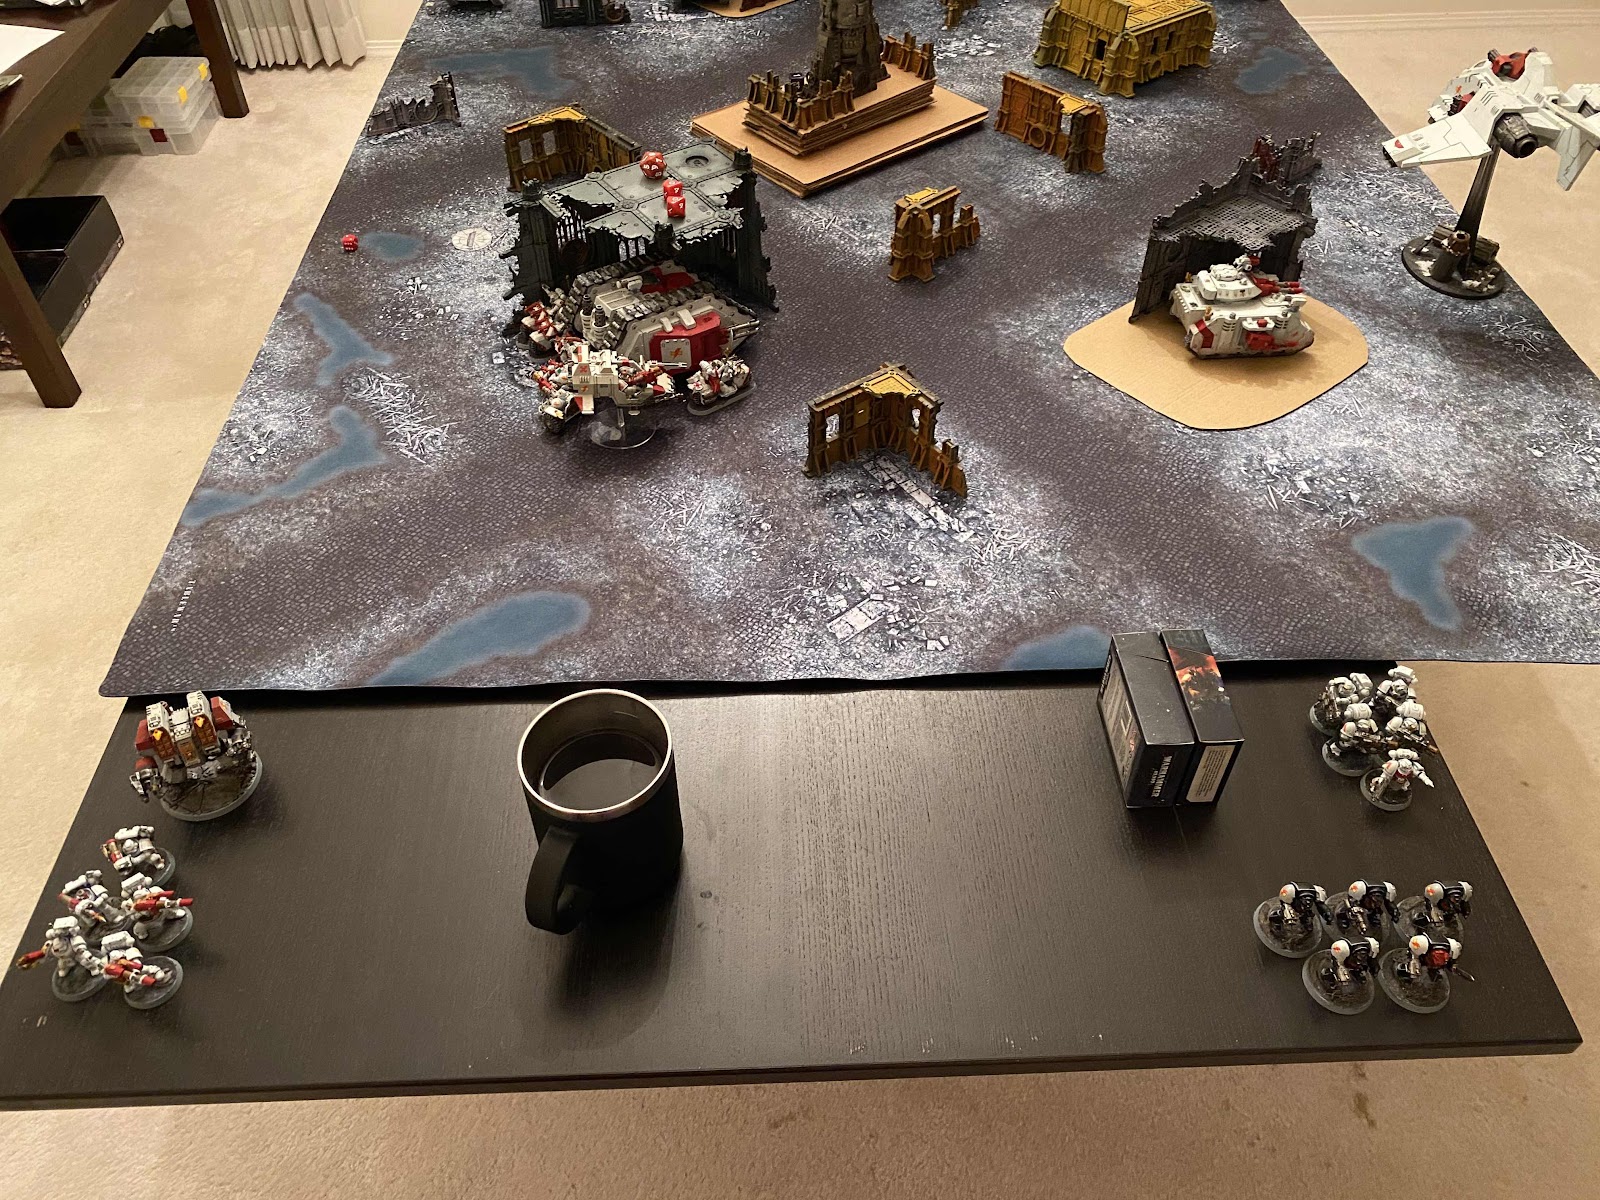
I changed the size of the deployment zones, and orientation of the table, so that the defender (SoO) deployment was in the middle strip of the table running from long side to long side, and the attacker was deploying along both of the short sides of the table. This allowed me to keep the recommended sizes of each deployment zone, since it was still 44” across the table from one attacker edge to the other. A much simpler way of stating is that I took the 60x44” table and then halved it and only used one side, which was 30x44”, only rotated 90 degrees so it was like the defender was being attacked from the west and east as they traveled north-south, rather than from the north and south as they traveled east-west. 


Not that it matters much, but my intent was to keep the mission as much intact as I could, while using smaller forces. There are no objective points in this mission; it is purely a kill-fest. The twist is in how the attacker deploys and what that does to who gets the first turn. The idea is that the attacker is laying an ambush on the defender’s traveling convoy. However, the defender is faster or earlier than expected, so the attacker doesn’t have all of their forces ready to go at the best time. The attacker has a choice—go ahead with the attack without the complete force (reinforcements do not arrive until the third turn), or wait a little for the whole force to show up (the defender senses the coming ambush, and gets to take the first turn).


I did the roll-off, and it came to the SoO to choose to which role to play. The core idea of the army is more of a defensive one, so I chose for them to be the defender. And naturally, the core idea of my White Scars are that they are fast and aggressive, especially as an Outrider detachment. They were to be the attacker. Now, knowing my White Scars capabilities and my tendency to get them too deep and vulnerable, I decided it would be best for them to attack as a complete force (giving up the first turn to the Sons of Omegon). I reasoned that they would be either obscured or behind cover, so wouldn’t take too much damage from letting the enemy act first. 


And, at the same time, I needed all of my units on the board in order to execute the pincer attack from both sides. See, if you opt to go ahead and attack without the full force, the number of units that are kept in reserve (again, until turn 3) has to be at least half of your force. I only had five units, so that would mean three of five, leaving only two units on the board. What would I do with any two of these units against the whole SoO Battalion? Well, now, after the fact, I have some ideas. I’ll go into those later.


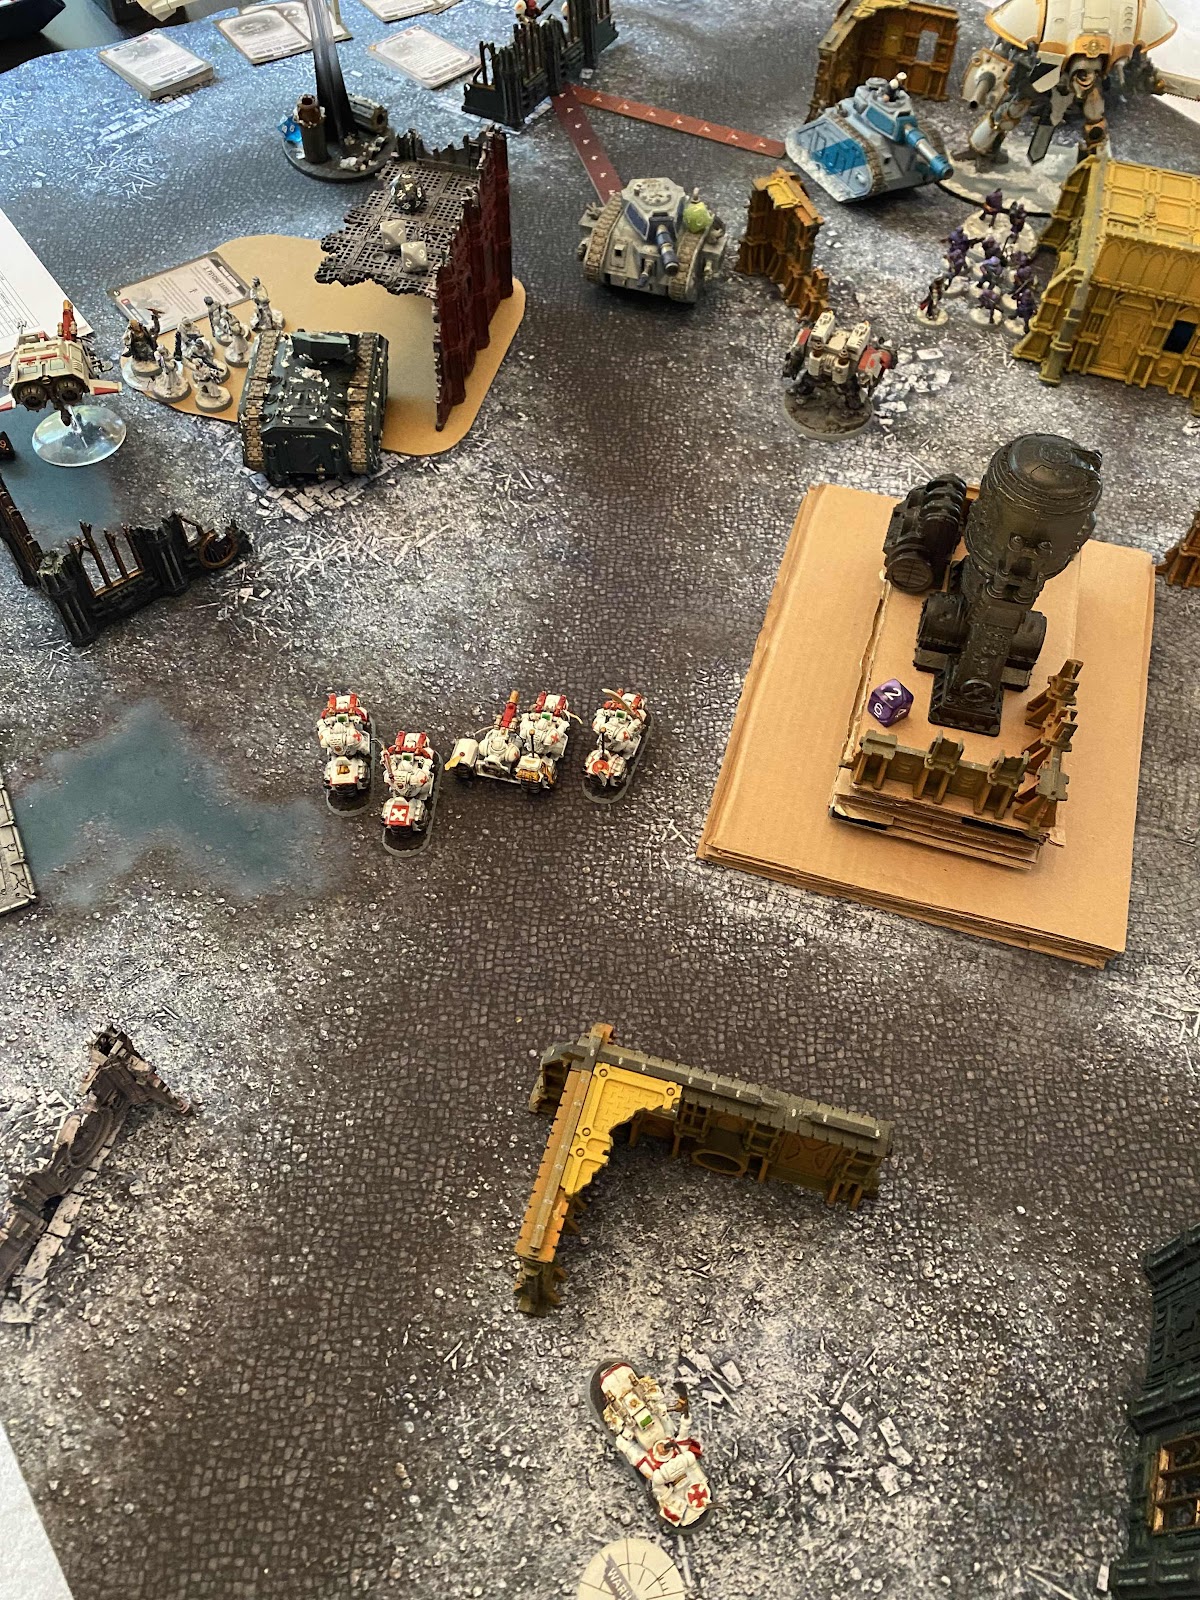
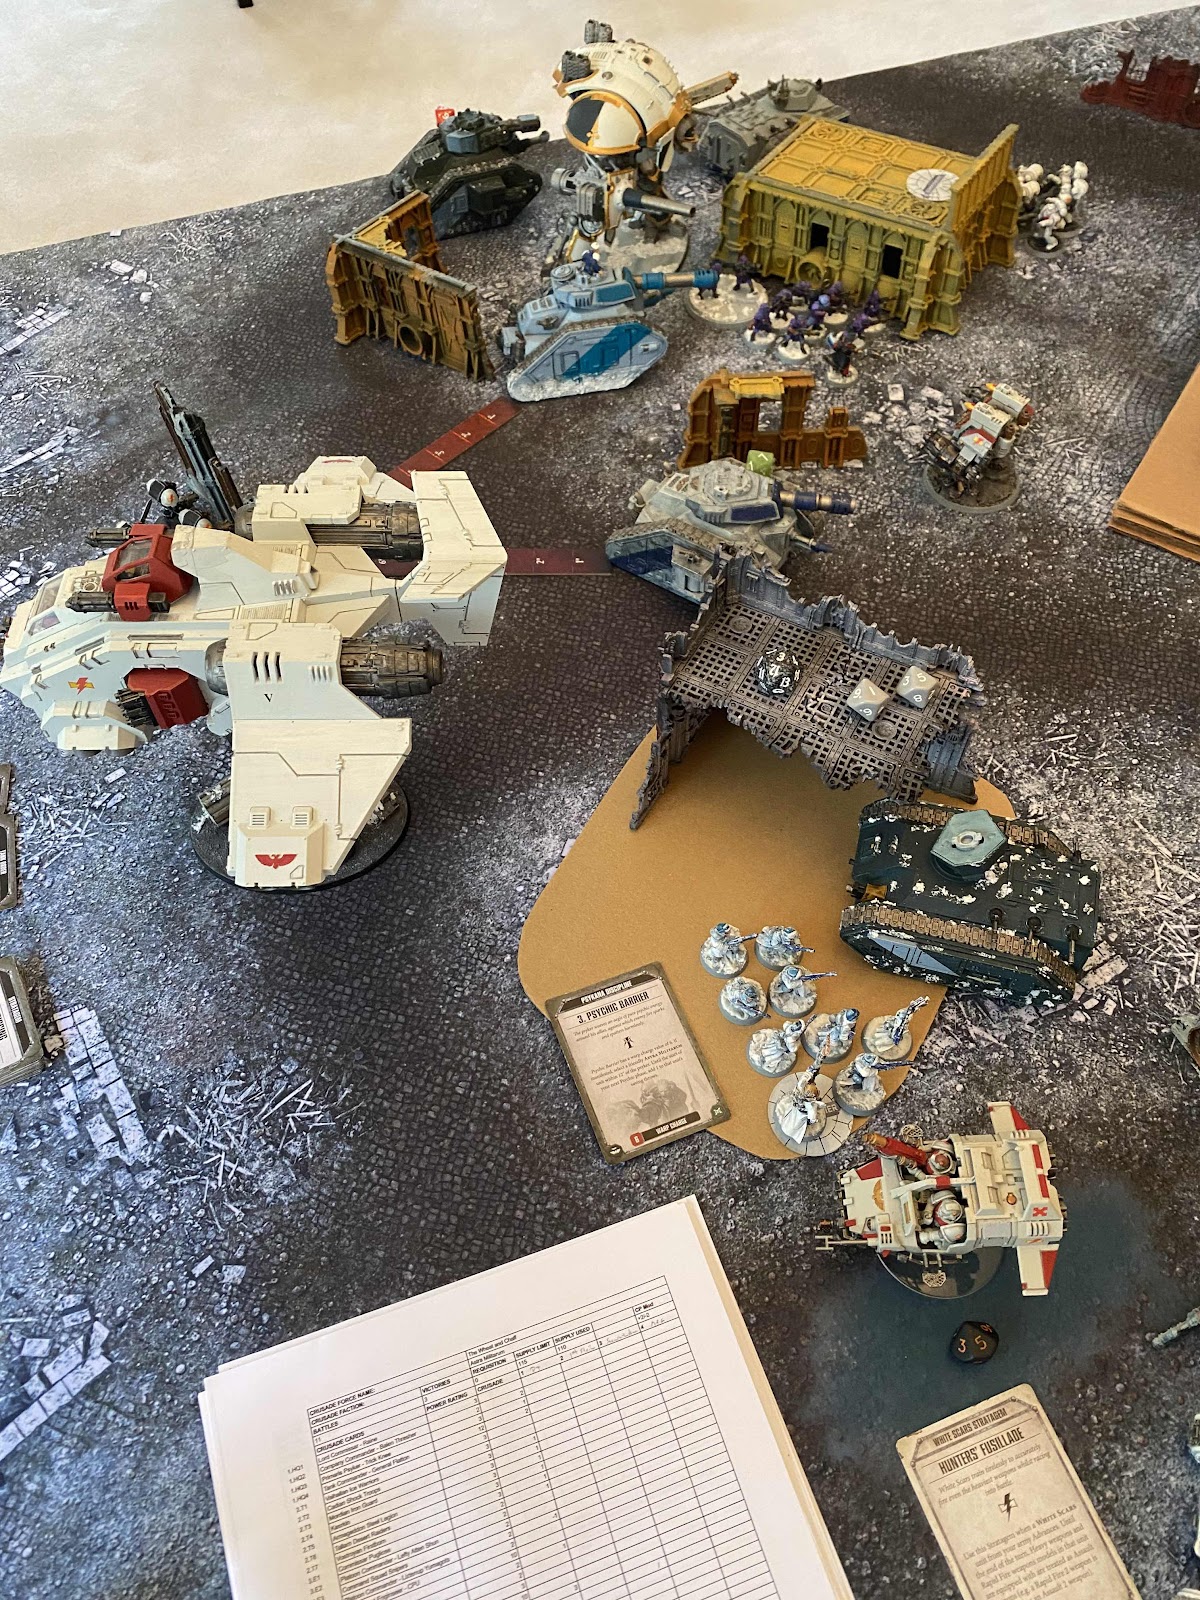
I set the White Scars up with the Land Speeder and Terminators on one side, and the Assault Squad and Khan with Bike Squad on the other. The Sons of Omegon are in the center, in a line from top to bottom, with the Redemptor at the top,  then the three Intercessor squads and two HQs clumped together in the center.


So, first off, I have to say that my ideal for how the Sons of Omegon should play went off pretty much without a hitch during this game. They were able to first blunt, and then weather the White Scars attack, and then punish them for it with overlapping defensive fire (Defensive Focus stratagem), auras (from the Lt and Captain both in the center of all three Intercessor Squads), and Heroic Interventions. How did it all go? 


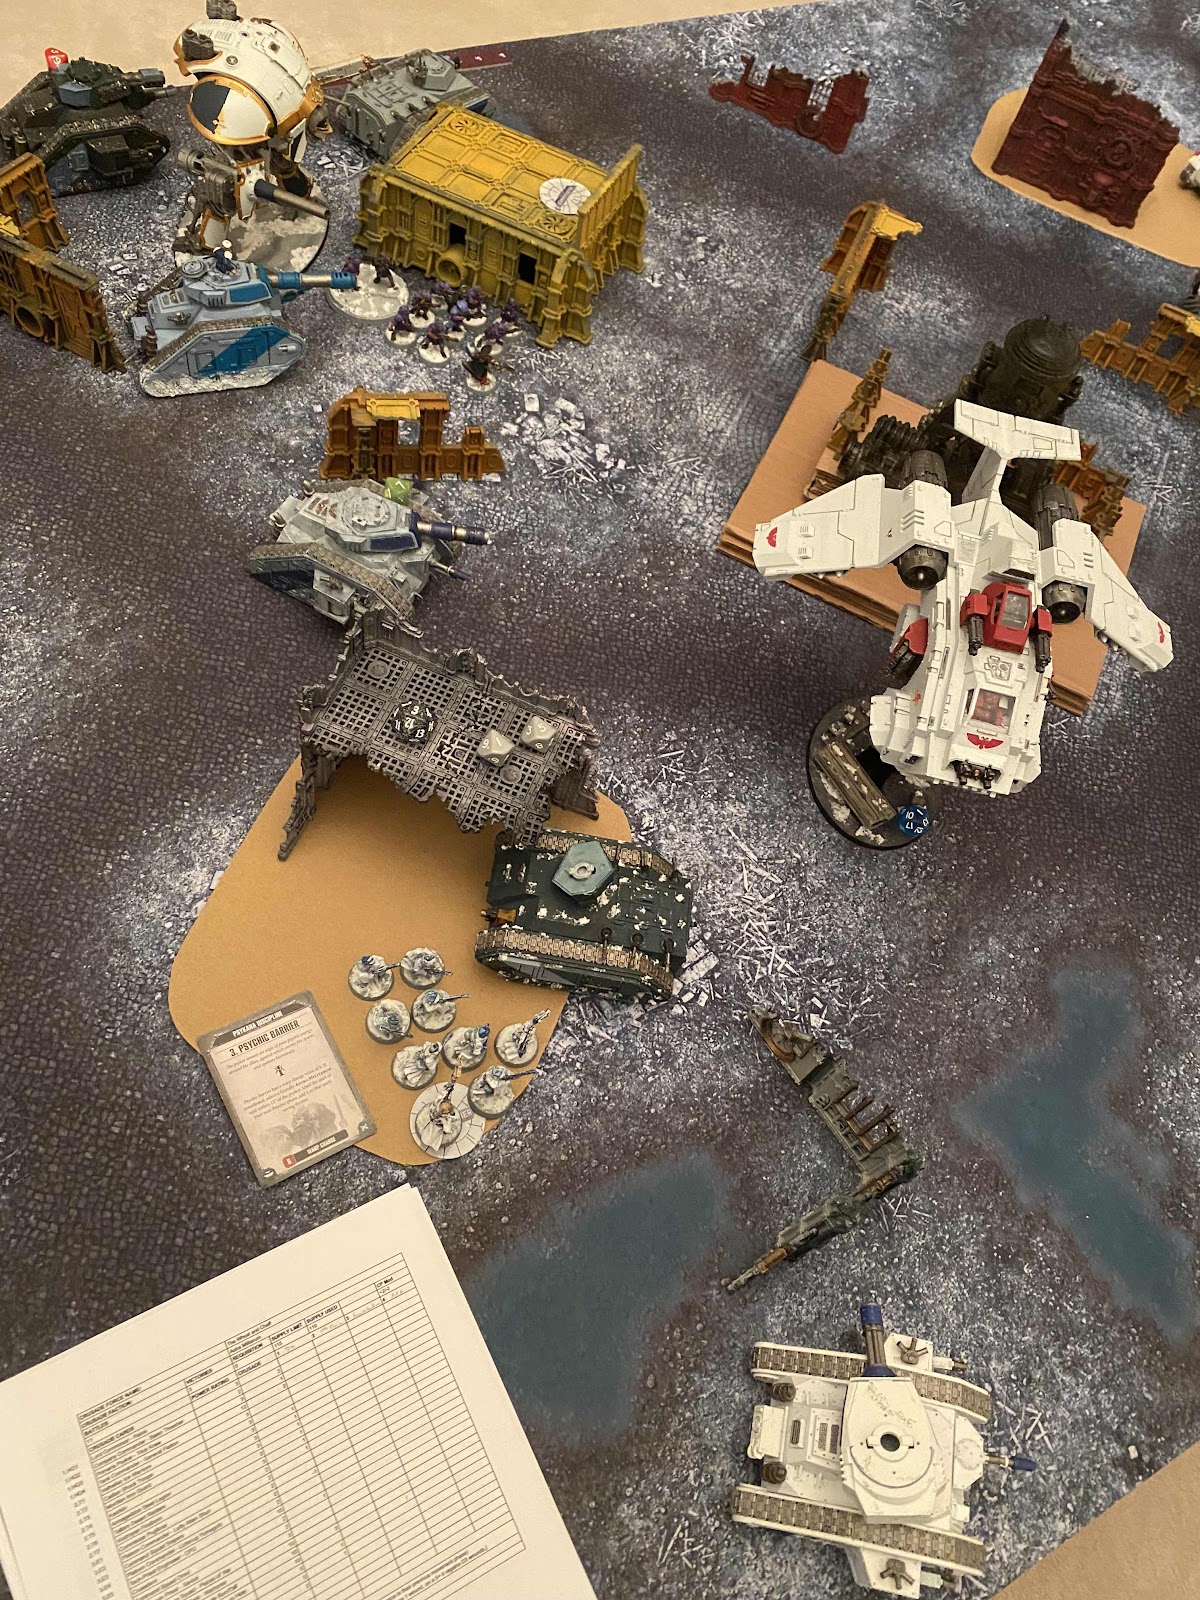
Round 1, SoO get the first turn. The Redemptor dreadnought immediately recognizes the largest threat to himself on the board as the Terminator Squad. He was, in fact, deployed as far from them as possible, since they were on the board first. He is able to get a decent line of fire on them using his 8” move, however they are still behind cover, so are getting to add 1 to their saves. To make matters worse, he rolls a 1 for his Macro Plasma Incinerator’s volley of shots, and that is then re-rolled into another 1. Bleh. Well, he is also re-rolling 1s to hit thanks to the strat giving him Rites of War for a turn, so he goes ahead and overcharges his single shot to 9 str, and kills one terminator with the 3 damage resulting.


The Intercessors around the table are to kill another with their combined firepower. The Lt and Cpt. are out of pistol range. There are no charges from the SoO. I considered having the Redemptor charge the Land Speeder, but had to decide on terrain rules, since there was a kind of low barrier between the models. I decided that the barrier and others like it around the table should have the Difficult Ground terrain trait, allowing for units to charge across them, but at the cost of adding 2” to the distance. The Redemptor then attempted the charge, but failed it.


During the White Scars turn, the Terminators advanced toward the Redemptor, planning to tear it to pieces with their Power Fists. I used Hunter’s Fusillade to turn all their storm bolters and heavy flamer into assault weapons for the turn, so they could shoot, as well. The Land Speeder flew up to be on top of the center building on the map, out of Redemptor charge range, but in a spot to shoot him with the multi-melta, and an Intercessor Squad (Capella) with the heavy flamer. The Assault squad advance, also toward Capella, and get to a pretty trivial charge distance. The Bike Squad move together with the Khan (who advances, to trigger his -1 to hit status), right up to Intercessor squad Bellatrix, hoping to get at the Captain behind them. I should mention here that one agenda I took was Quest of Atonement, to try to remove the Bike Squad’s battle scar by killing an enemy character of 5 PL or more. Well only Captain Herkyul fits the bill, since Lieutenant Ifit is only worth 4 PL. 


The other agenda I took were mostly unimportant, but for SoO it was Know No Fear (get experience points for passing morale tests) and King Slayer (Slay the Warlord). The other on the Scars side was First Into the Fray, which says the first unit you have to Charge or Heroically Intervene gets 1 xp, 2 if they do it in round one, and 3 if they then succeed in killing an enemy unit. This one is (afaik) only found on a card (like stratagem card sized) I got from the Warhammer store around the time of when 9th had just come out last year. I wonder how many of these there are?


Anyway, back to the WS turn, in shooting, the Terminators remove one Intercessor from squad Aldebaran, the Land Speeder unleashes raw melta fury into Redemptor Ophiuchus, dealing him 8 wounds (even after subtracting 1 per attack), and kills one of squad Capella with the heavy flamer. The Assault Squad have a flamer also, and I think do one more wound to Capella. The Khan can’t shoot since he advanced, but the Bike Squad have 4x twin boltguns, a heavy bolter, and a combi-melta. They remove one, maybe two guys from Bellatrix. 


Charge phase, Terminators go at Ophiucus. There are three left at this point. He fires overwatch with everything he’s got, and removes one, so two get in on him. One with a power fist, and the other a Sgt with a power sword. 2 more wounds taken off. Either I forgot to fight back with the dreadnought, or he missed all 4 attacks due to his reduced WS of 5+. I think it was the latter. Assault Squad fights Capella, killing one, losing one in the fighting back. The Khan and Bike Squad charge into Bellatrix. At this point I used Defensive Focus to allow up to 3 other units around Bellatrix (but not Bellatrix itself, per the FAQ) to fire Overwatch on behalf of them. This would have been Aldebaran, the Lt., and the Cpt., since Capella up above were already in combat with the Assault Squad. I wish I could recall exactly what went off. I don’t think anything died.  Anyway, Lt. and Cpt both Heroically Intervene (Lt has Warden of Macragge, so he can do so from 6” away, even). The Khan fights first, killing one or two more of Bellatrix. The Bike Squad fight next, trying to finish off that squad. They remove all but the Sgt. The Sons of Omegon fight back, the Captain wounding the Khan, and the Sgt and Lieutenant together killing one biker, and nearly killing the attack bike also (which has 5 wounds). Watch out for that Burning Blade! S3/-5 AP/2 damage on that thing. Morale tests are taken, and that is the end of round 1. The SoO had lost 7 Intercessors across all 3 squads, and the WS had lost 3 Terminators, an Assault Marine, and a Biker.


Round 2: The Sons of Omegon fall back from all combats. The Lt. retains the ability to charge back in with his hellacious blade via the Fall Back and Re-engage stratagem. The Captain has the Calm Under Fire warlord trait, so all shooting will be done at normal BS. Conveniently, it’s not an aura that specifies Core units only, so he can fire his own Sunwrath pistol at 2+. This is a Pistol 2 S8/-3AP/2 damage gun, by the way. Ophiuchus is Core, but out of range, so after falling back he’s shooting at 6+. Still, he manages to kill a Terminator. Squad Aldebaran kills the final one with their Bolt Rifles and Astartes Grenade Launcher. Squad Capella up on the building shoot at the Assault Squad they were in combat with, killing a second of them. Only the Sgt is left from Bellatrix. He and the Lt and Cpt. all shoot. The Captain’s Sunwrath pistol finishes off the attack bike that is part of the Bike Squad. I believe that is all.


The Lt is able to charge back in, and does so, killing both remaining Bikers. End of SoO turn.


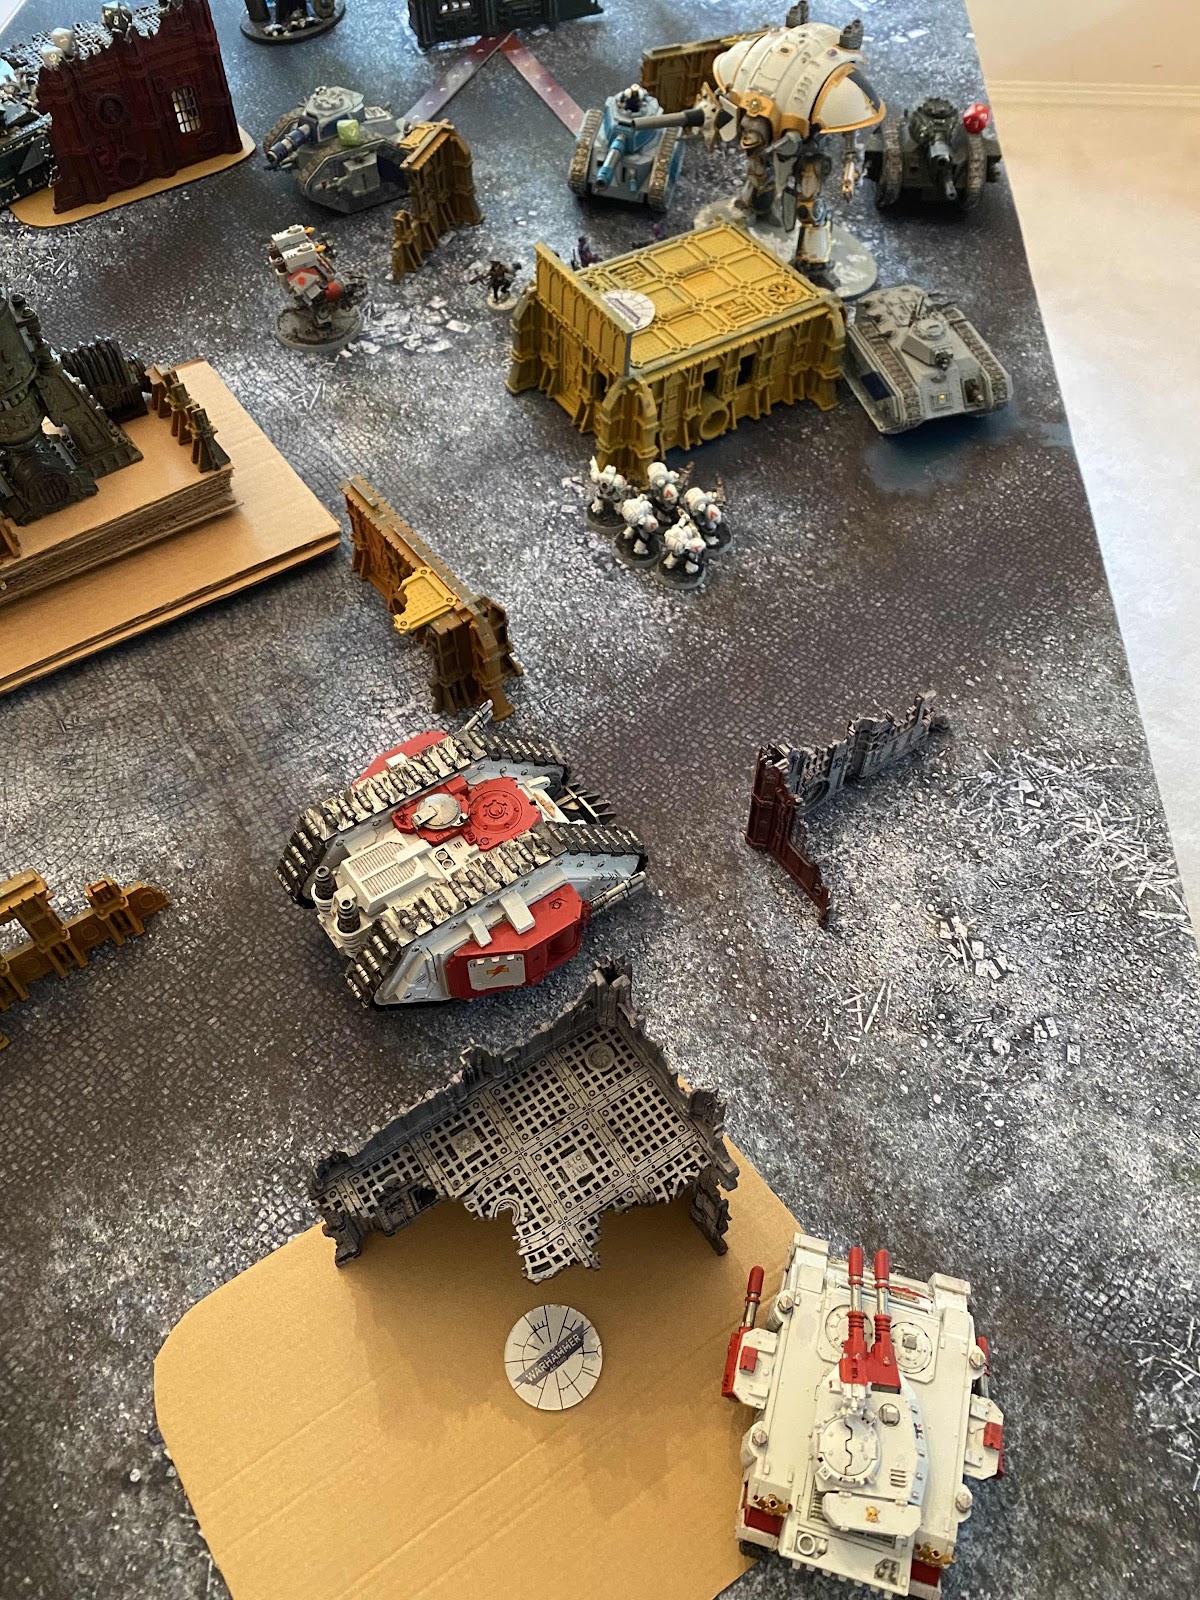
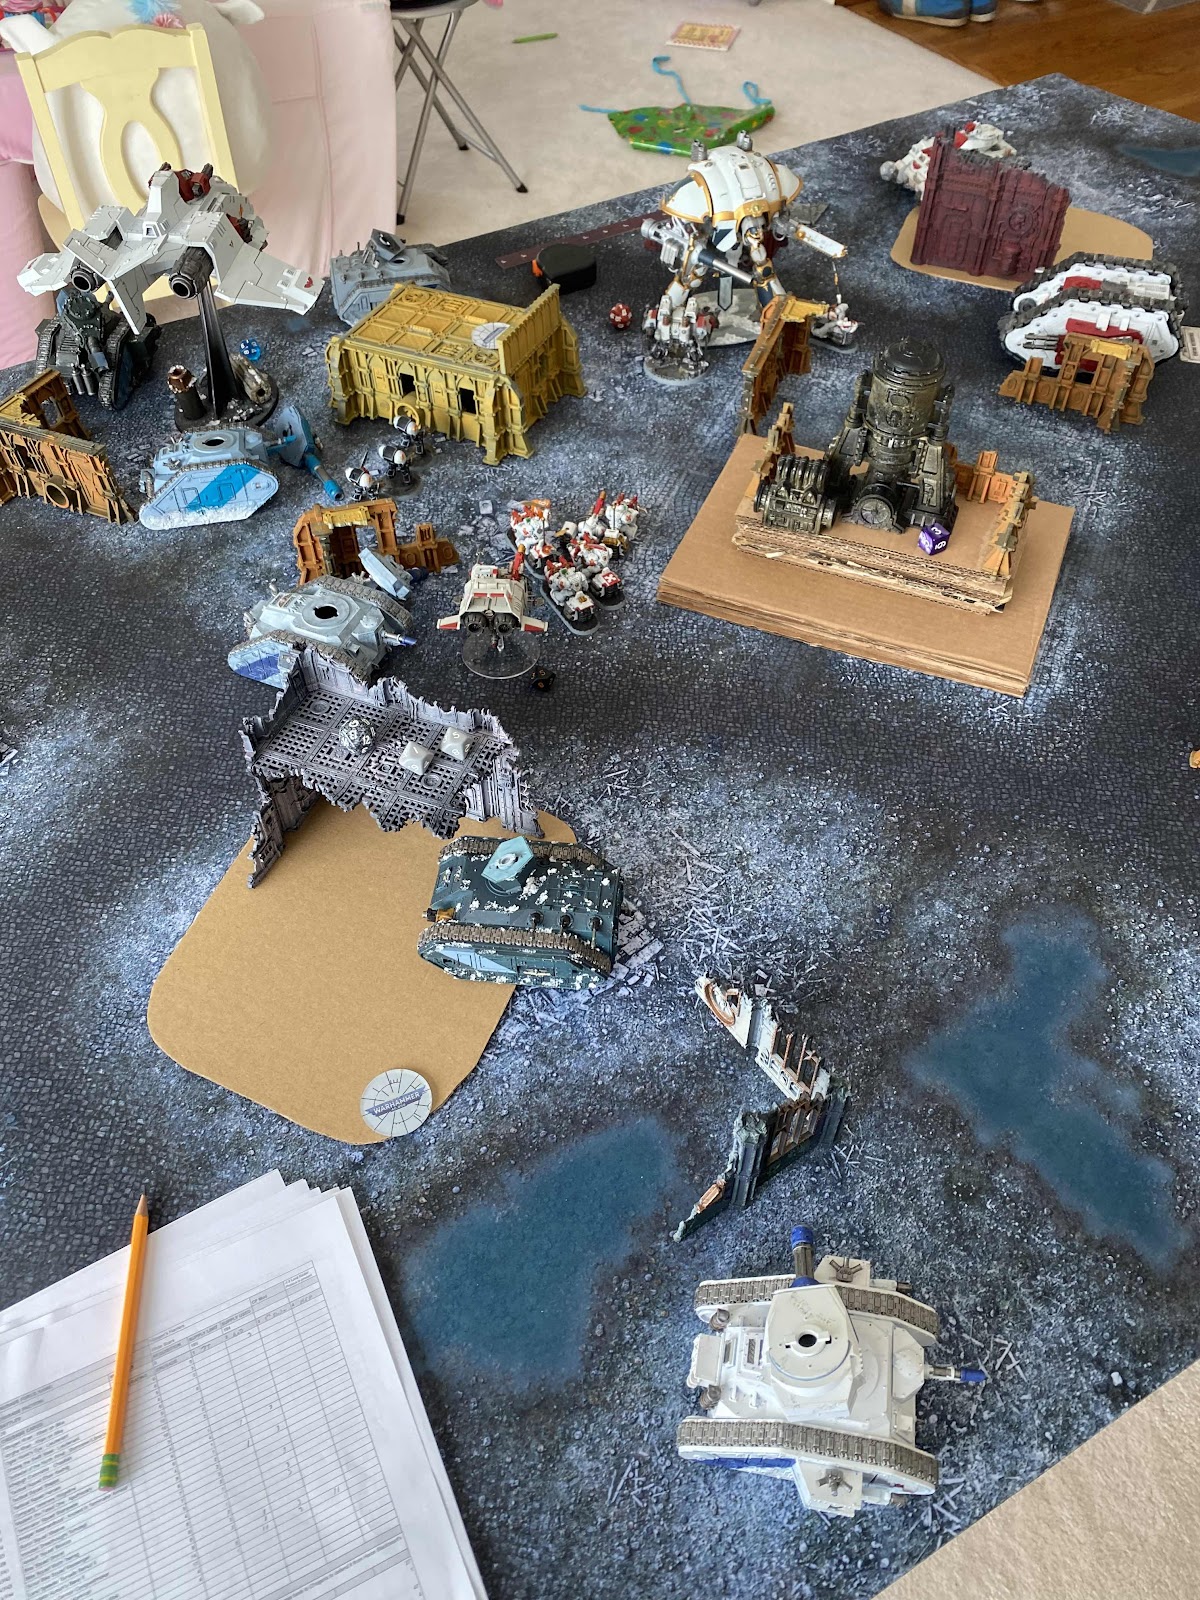
WS turn 2. At this point all that is really left is the Land Speeder, 3 Assault Marines, and the Khan with I think 2 wounds left. The Assault Marines fly down to be near the Khan and enemy HQs, and the Land Speeder also comes down off the same building. The Khan advances to trigger his -1 to hit status, just looping around a terrain piece, ending on the other size of the Assault Squad, and close for charges either into SoO HQs or into squad Aldebaran. In shooting, the Land Speeder again face-melts Ophiuchus, right off the board this time. The heavy flamer removes two form Aldebaran, as well. The Khan can’t shoot, and the Assault Squad can, but does maybe one wound to Captain Herkyul with their flamer and single bolt pistol (Sgt has two chainswords). The Khan and Assault Squad charge into the Cpt/Lt./Sgt from Bellatrix grouping, and get a few wounds off the Cpt, but that’s all. In the fighting back, the Khan dies, as I recall. Records indicate it was probably the Lt. who killed him. I think one Assault Marine dies, as well.


Round 3, SoO turn 3. All that is left of the White Scars is the Land Speeder and I think two Assault Marines. Again, the Lt. gets Fall Back and Re-engage. Everyone in combat falls back, the Captain finishes off the Assault Marines with the Sunwrath pistol, and the Lt. charges in and destroys the Land Speeder with The Burning Blade. That thing is sick. Game over.


So, what might I have done differently as the White Scars? Well, I don’t think the Sons of Omegon would have extended too much out of their defensive posture in the first two turns, knowing the hammer was going to drop eventually. So, perhaps I could have forward deployed the Terminator Squad and Bike Squad, both units being made up of 3-wound and relatively tough models defensively, and tried to stay hidden from as much of the SoO as possible, while still taking pot shots to harry them as the opportunity arose. Then, once the Land Speeder, Assault Squad, and Khan all showed up, I could probably count on at least one successful charge from the Khan (rolling 3D6 and dropping the low one as a stratagem, and rerolling the charge roll if needed by virtue of his Warlord Trait). I might even been able to get two charges off using that strat on the Assault Squad and counting on the Khan to make do with his trait. The Land Speeder doesn’t need to charge of course, since it is there just for the multi-melta and heavy flamer.


Then again, its also possible that the SoO would have seized the chance to wipe out two units ahead of the other three. Would they be able to take down the T5 bikers and the five Terminators? It’s certainly possible, given good rolls for the Redemptor and smart positioning of the Lieutenant and Captain with their powerful melee weapons. And of course we can’t discount the 3 Intercessor Squads combined 30 bolt rifle rounds (and grenade) per turn, either. Defensive deployment of the Scars during the first two turns might have foiled these plans, though. it’s hard to say.


So, I’m very happy with how the SoO held up as intended under fire. I think this game has finally illustrated to me how Heroic Interventions are supposed to work. You have your character screened by another unit, the chargers go into said unit, and now your character jumps in, giving the attacker the bad choice between killing the screening unit (which are not too shabby in combat themselves—no guardsman, these) or trying get to the character with whatever few models are close enough to it. Thereby, the attacker might be splitting the fighting unit’s attacks between the target character (for those models close enough) or the screening unit (for the ones not close enough), and in all likelihood killing neither. They are then also left receiving the return attacks from both screener and character. Heroic Interventions have never been something I concerned myself with all that much, since they have occurred fairly rarely in my games, but they are something I’ll definitely be more mindful of going forward.


I want to also mention the attacks disparity between firstborn and Primaris marines. Now that everyone has 2 wounds, this is the only thing differentiating the two generation of marines. Well, on the stat line, anyway. It felt like a little bit of an uphill battle having my firstborn bikers and assault marines, who only get one attack base (two for the Sgts), fighting against Intercessors, who get two base (three for Sgts). Just something to keep in mind. The balancing factor is that the firstborn are either cheaper to run, or come with more wargear like jump packs or get to choose special or heavy weapons where Primaris don’t. Or they come in larger sized units (Bikers vs Outriders). Terminators match baseline Primaris’ 2 attacks for your average guy, but then Aggressors and Bladeguard (as Veterans) get 3 attacks base, 4 on the Sgt. 


I think more attacks might be more than enough to offset the other stuff in Primaris’ favor. In the case of a combat-focused chapter like White Scars, at the very least. It might be time to hustle along my Crusade narrative so that the force starts to pickup their Primaris reinforcements! My Requisition for this battle, though, has already been spent to add a second Bike Squad to the force, with another attack bike, this one with a multi-melta. So, next game will probably be another Outrider detachment full of bikes and the Speeder and whatever else. Or, since I’ll probably go against my Astra Militarum, I can probably bring a Battalion and not spend those 3 CP—which I did miss, by the way. They might not have made a huge difference, but with a re-roll here or there, you never know. I want that new 9th edition Ravenwing detachment consideration for my White Scars.


Saturday, January 2, 2021

2020 In Reading

 I have continued to voraciously consume Warhammer lore, in various forms, in 2020, and almost the entirety of this list is made up of such. Many of these are short stories I recorded individually, some are novels, some are complations of short stories, some are magazines, some are lore or rules supplements for the tabletop game, et cetera.

I don't really know how to express all of this in 'books read' or anything, nor do I have a wordcount, but the day this year when I haven't been reading something has been rare. And I feel like that is a good thing! So, here's to more of that going forward into 2021. If I have one resolution, it would be to read more non-fiction, as well. History, especially.

From this massive list below, I'd like to choose a book of the year, and it must fall to Dan Abnett's Saturnine, the incredible fourth novel in the Horus Heresy: Siege of Terra series. Other highlights include Aaron Dembski-Bowden's Spear of the Emperor, Chris Wraight's Valdor: Birth of the Imperium and Watchers of the Throne: The Emperor's Legion, Guy Haley's Devastation of Baal and Dawn of Fire: Avenging Son, Graham McNeill's Sons of the Selenar and Fury of Magnus, and oh, I'll stop now. Suffice it to say there is some really good stuff being written for Warhammer properties! 

Psychic Awakening: Blood of Baal

White Dwarf 457

Bitter End

The Lightning Hall

Sacrifice

Primary Instinct

But Dust In The Wind

Exhumed

His Will

Heart of Rage

Codex Supplement: Iron Hands

Embers of Extinction

The Serpent’s Dance

White Dwarf 456

The Infinite and the Divine

Index Astartes Renegade Space Marine Chapters

Index Astartes Alpha Legion

White Dwarf 455

Honourbound

The Darkling Hours

Fire and Thunder

Trials

A Company of Shadows

Execution

Psychic Awakening: Sanguine

Psychic Awakening: The Shadow

Psychic Awakening: The Weak and the Strong

Psychic Awakening: Chase the Wind

Psychic Awakening: The Power of Belief

Psychic Awakening: Keeping Order

Psychic Awakening: A Test of Faith

Psychic Awakening: Into the Void

Psychic Awakening: The Gift of Hope

Psychic Awakening: The Path

The Walking Dead (Whisperer War to end)

Codex: Space Marines (2020)

Lion El'Jonson: Lord of the First

First Legion

Fury of Magnus

A Witch's Fate

Dawn of Fire: Avenging Son

The Funeral

Voices in the Glass

Miracles

Runner

The Shadow Crown

Mud and Mist

The Thing in the Woods

A Deep and Steady Tread

Skin Man

Vox Daemonicus

Psychic Awakening: Ritual of the Damned

These Hands, These Wings

A Threnody for Kolchev

Suffer the Vision

Hab Fever Lockdown

The Summons of Shadows

Flesh and Blood

A Sending from the Grave

From the Halls, the Silence

Supplication

The Growing Seasons

Blood Sacrifice

The Healer

Stitches

He Feasts Forever

The Confession of Convict Kline

The Hunt

The Nothings

The Marauder Lives

A Darksome Place

Triggers

The Last Ascension of Dominic Seroff

Predation of the Eagle

The Long Games at Carcharias

Last of the Blood

The Chapo Guide to Revolution

No Good Deed

The Widow Tide

Nepenthe

Our Lord on Terra

Indomitus

Black Library: The Art of Warhammer 40,000

Black Dawn

Psychic Awakening: Pariah

The Edge of Silence

The Rewards of Tolerance

Runes

Daemonifuge

The Wonderworker

White Dwarf 454

The Devastation of Baal

Psychic Awakening: War of the Spider

Warhammer 40,000 Comics from Titan Publishing

Codex: Adeptus Custodes

Psychic Awakening: For Every End, a Beginning

Psychic Awakening: Consequences

Psychic Awakening: A Traitor's Trust

Devourer

The Word of the Silent King

Valdor: Birth of the Imperium

Codex Supplement: White Scars

Codex: Space Marines

At Gaius Point

Orphans of the Kraken

The Trial of the Mantis Warriors

The Last Detail

Consequences

The Returned

Twelve Wolves

The Teller of Tales

The God's Son

White Dwarf 453

White Dwarf 452

The First Primaris

Son of the Storm World

Blood Guilt

Watchers of the Throne: The Emperor's Legion

White Dwarf 451

Saturnine

Hunt for Voldorius

Psychic Awakening: The Greater Good

The Will of the Legion

Celestine: The Living Saint

Konrad Curze: The Night Haunter

White Dwarf 450

Spear of the Emperor

Sons of the Selenar

Sammael: Lord of the Eternal Hunt

Kor'sarro Khan: Huntmaster

White Dwarf (December)

Blood of Iax

White Dwarf (November)

Angron: Slave of Nuceria

Kill Team Annual 2019